AIサマリー
はじめに
確認メッセージに雪が降るアニメーションを追加したいですか? PHPとJavaScriptを使えば、確認メッセージにインタラクティブな効果をもたらすアニメーションを簡単に追加することができます。 このチュートリアルでは、これを実現するための各ステップを説明します。
フォームの作成
まず、フォームを作成する必要があります。 このチュートリアルでは、注文フォームを作成します。注文が完了すると、落雪アニメーションが表示される確認メッセージが表示されます。
フォームの作成にヘルプが必要な場合は、こちらのドキュメントをご覧ください。
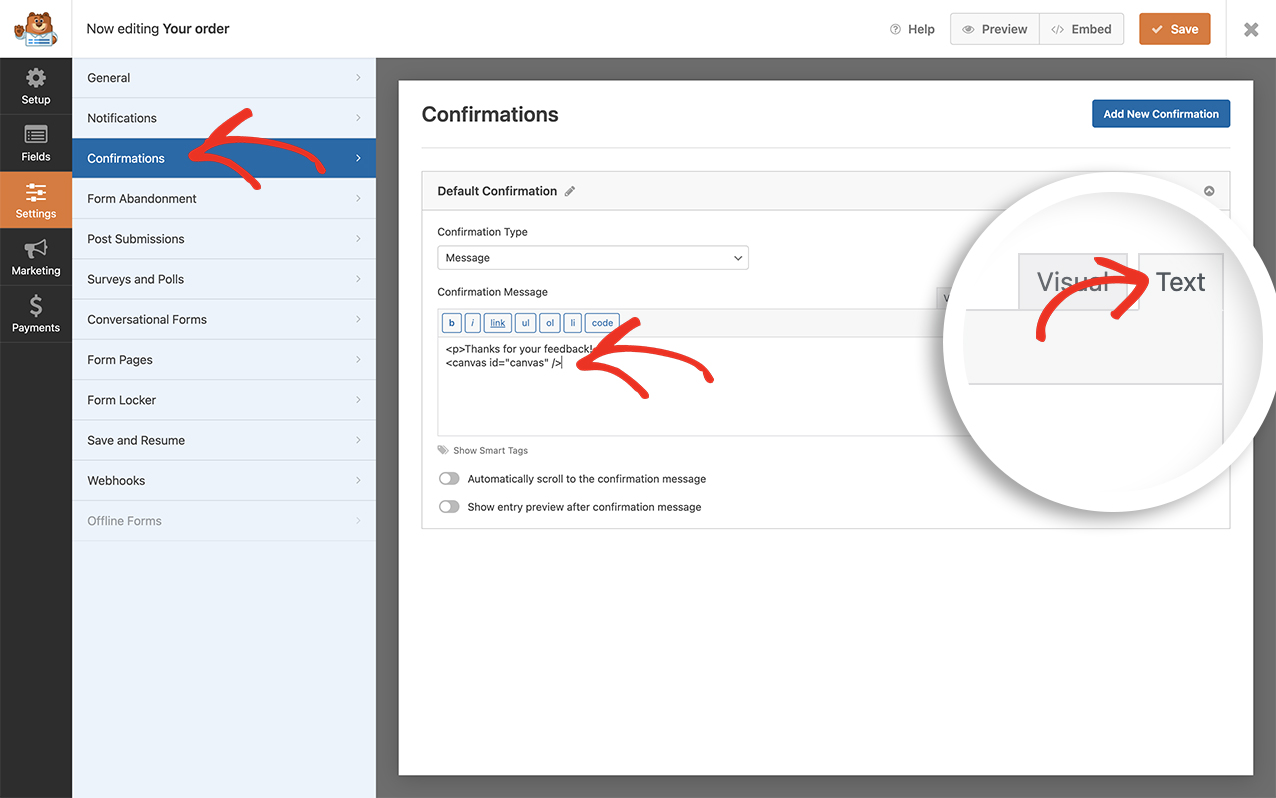
フィールドを追加したら、[Settings]タブをクリックし、[Confirmations]をクリックします。確認メッセージウィンドウの中に、IDがcanvasのHTML canvas要素を追加して、紙吹雪が降る場所を正確に狙えるようにします。
確認」タブに入ったら、メッセージボックスの「テキスト」タブをクリックします。このメッセージエリアに純粋なHTMLを追加するには、この操作が必要です。

を加えるだけである。 <canvas id="canvas" />
この canvas 要素と ID を追加すると、この雪が表示される場所を制御できるようになります。確認メッセージにのみ表示させたいので、コード スニペットで特にターゲットにできる要素を追加しています。
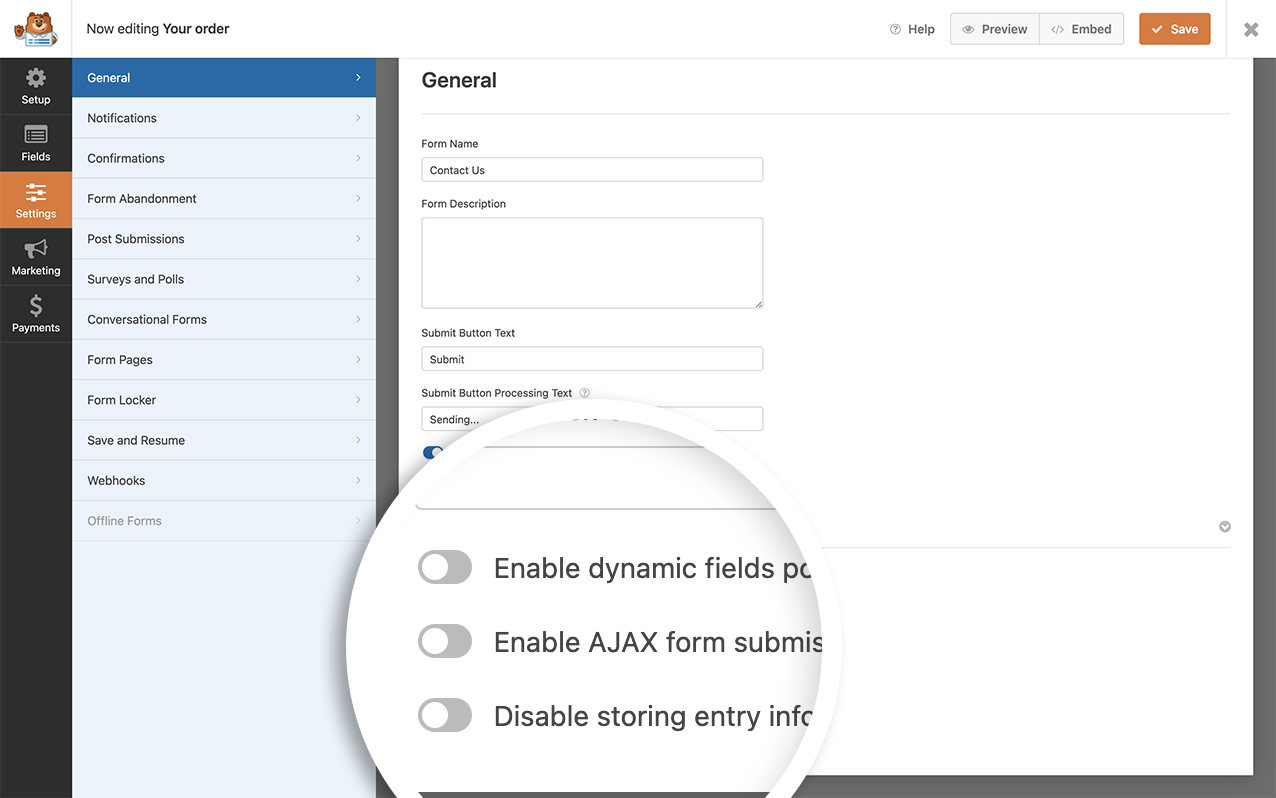
このスニペットは非 AJAX フォームでのみ動作します。フォームビルダー内の AJAX 設定をオフにする必要があります。この設定を無効にするには、フォームビルダーの[設定]タブを開き、[詳細設定] の [AJAX フォーム送信を有効にする] 設定を無効にします。

キャンバス・ラッパー用のCSSを追加する
のカスタムCSSも追加する必要があります。 <canvas id="canvas" /> ラッパーを使用しています。カスタムCSSを追加する方法と場所についてヘルプが必要な場合は、こちらをご覧ください、 このチュートリアルをご覧ください。.このCSSをコピーしてあなたのサイトに貼り付けるだけです。
canvas#canvas {
    position: absolute;
    top: 0;
    left: 0;
}
雪を作るコード・スニペットの追加
さて、いよいよ魔法を起こすコード・スニペットを追加しましょう。スニペットをサイトに追加する方法については、こちらのチュートリアルをご覧ください。
/**
 * Add falling snow to the canvas element on the confirmation message
 *
 * @link  https://wpforms.com/developers/how-to-add-falling-snow-animation-to-your-confirmation-message/
 */

function wpf_dev_winter_scene_animation() {
?>

<script type="text/javascript">
    //If the canvas ID does not exist on the page, this script will not run

    if (document.querySelector( '#canvas' ) !== null) {
//canvas init
	var canvas = document.getElementById( "canvas" );
	var ctx = canvas.getContext( "2d" );

	//canvas dimensions
	var W = window.innerWidth;
	var H = window.innerHeight;
	canvas.width = W;
	canvas.height = H;

	//snowflake particles
	var mp = 50; //max particles
	var particles = [];
	for(var i = 0; i < mp; i++)
	{
		particles.push({
			x: Math.random()*W, //x-coordinate
			y: Math.random()*H, //y-coordinate
			r: Math.random()*4+1, //radius
			d: Math.random()*mp //density
		})
	}

	//Lets draw the flakes
	function draw()
	{
		ctx.clearRect(0, 0, W, H);

		ctx.fillStyle = "white";
		ctx.beginPath();
		for(var i = 0; i < mp; i++)
		{
			var p = particles[i];
			ctx.moveTo(p.x, p.y);
			ctx.arc(p.x, p.y, p.r, 0, Math.PI*2, true);
		}
		ctx.fill();
		update();
	}

	//Function to move the snowflakes
	//angle will be an ongoing incremental flag. Sin and Cos functions will be applied to it to create vertical and horizontal movements of the flakes
	var angle = 0;
	function update()
	{
		angle += 0.01;
		for(var i = 0; i < mp; i++)
		{
			var p = particles[i];
			//Updating X and Y coordinates
			//We will add 1 to the cos function to prevent negative values which will lead flakes to move upwards
			//Every particle has its own density which can be used to make the downward movement different for each flake
			//Lets make it more random by adding in the radius
			p.y += Math.cos(angle+p.d) + 1 + p.r/2;
			p.x += Math.sin(angle) * 2;

			//Sending flakes back from the top when it exits
			//Lets make it a bit more organic and let flakes enter from the left and right also.
			if(p.x > W+5 || p.x < -5 || p.y > H)
			{
				if(i%3 > 0) //66.67% of the flakes
				{
					particles[i] = {x: Math.random()*W, y: -10, r: p.r, d: p.d};
				}
				else
				{
					//If the flake is exitting from the right
					if(Math.sin(angle) > 0)
					{
						//Enter from the left
						particles[i] = {x: -5, y: Math.random()*H, r: p.r, d: p.d};
					}
					else
					{
						//Enter from the right
						particles[i] = {x: W+5, y: Math.random()*H, r: p.r, d: p.d};
					}
				}
			}
		}
	}

	//animation loop
	setInterval(draw, 25);

    }
</script>

<?php
}
add_action( 'wpforms_wp_footer_end', 'wpf_dev_winter_scene_animation', 1);

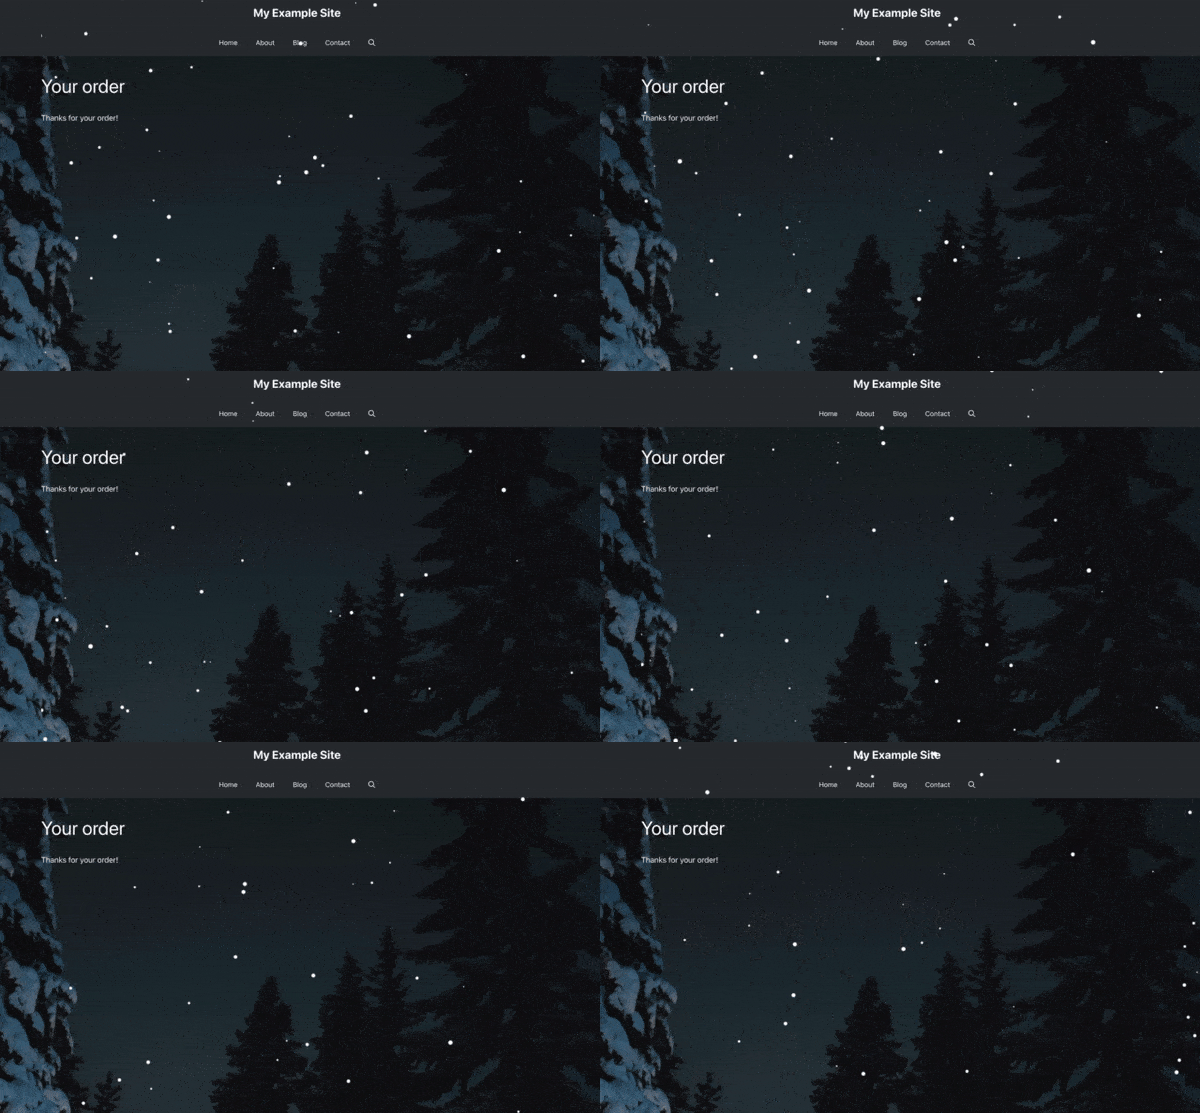
これだけです!これで確認メッセージに雪が降るアニメーションが追加できました。代わりに紙吹雪を追加したいですか?確認メッセージに紙吹雪のアニメーションを追加する方法のチュートリアルをご覧ください。
関連
アクション・リファレンス:wpforms_wp_footer_end
