AIサマリー
フォーム送信の入力日に自動的に年を追加したいですか?このチュートリアルでは、ボランティア用のフォームに開始日を設定する手順を説明します。さらに、PHPを使用して登録日から1年先の有効期限を動的に生成する方法を紹介します。これには、ボランティアの開始日と計算された有効期限の両方を保存する隠しフィールドを作成する必要があります。さあ、始めましょう!
フォームの作成
まず、新しいフォームを作成します。新しいフォームの作成方法についてサポートが必要な場合は、こちらのドキュメントをご覧ください。
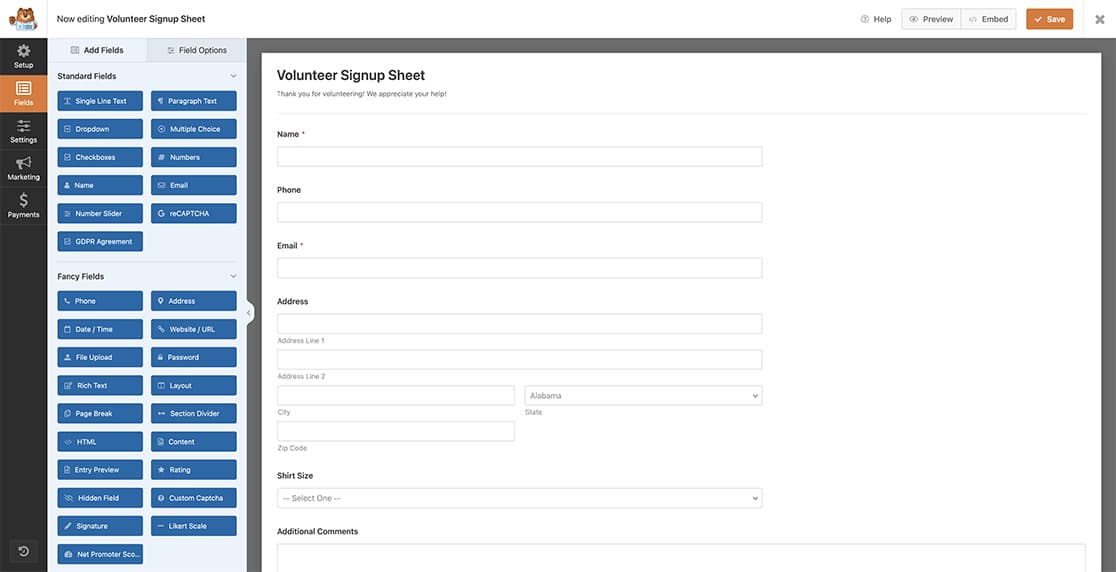
このチュートリアルでは、ボランティア登録フォームを作成します。このフォームはボランティアに必要な様々な情報を取得します。また、2つの隠しフィールドがあり、開始日(投稿の入力日)とボランティアの有効期限を保存します。

隠しフィールドの定義
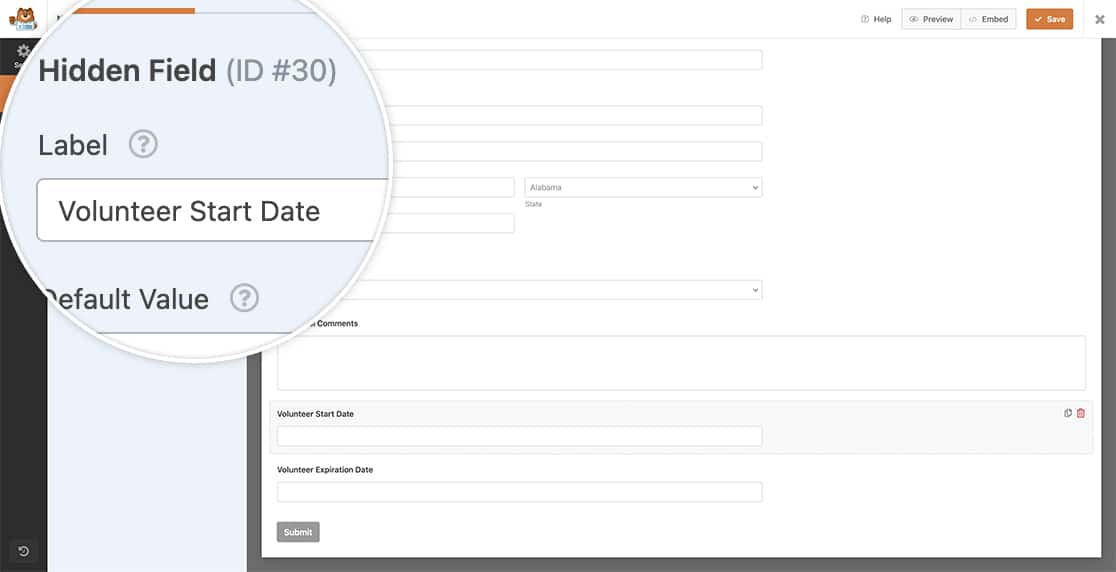
フォームの中には2つの隠しフィールドがあります。ひとつは、正確な入力日の情報を保存するためのもので、もうひとつは、入力日に1年を加え、そのデータを2つ目の隠しフィールドに保存するものです。

WPFormsの入力日に年を追加する
いよいよスニペットをサイトに追加します。スニペットをサイトに追加する方法と場所についてサポートが必要な場合は、このテーマに関するチュートリアルをご覧ください。
/**
 * Add one year to the entry date and store this date inside a hidden field
 *
 * @link   https://wpforms.com/developers/how-to-add-a-year-to-the-wpforms-entry-date/
 */

function wpf_dev_process_complete( $fields, $entry, $form_data, $entry_id ) {

    // Optional, you can limit to specific forms. Below, we restrict output to
    // form #2189.
    if ( absint( $form_data[ 'id' ] ) !== 2189 ) {
        return;
    }

    // Get the full entry object
    $entry = wpforms()->entry->get( $entry_id );

    // Fields are in JSON, so we decode to an array
    $entry_fields = json_decode( $entry->fields, true );

    // Checking to make sure Name field (ID 2) is not empty
	if (isset( $fields[2][ 'value' ] )) {

		// Set the date to today's date so the Entry Date is recorded
        // on the first hidden field in the form
        // Remember to update the 30 to match the field ID of your form for your first hidden field
		$entry_fields[30][ 'value' ] = date('m/d/Y');

        // Set the date format and store the current date in a variable
		$setDate = date('m/d/Y');
		$date = strtotime($setDate);

		// Get the date set above and add 1 year to this date
        $new_date = strtotime('+ 1 year', $date);

		// Store this new date inside the hidden field ID
		// Remember to update the 33 to match the field ID of your form for your second hidden field
		$entry_fields[33][ 'value' ] = date('m/d/Y', $new_date);

	}

    // Convert back to json
    $entry_fields = json_encode( $entry_fields );

    // Save changes
    wpforms()->entry->update( $entry_id, array( 'fields' => $entry_fields ), '', '', array( 'cap' => false ) );

}
add_action( 'wpforms_process_complete', 'wpf_dev_process_complete', 10, 4 );
上記のスニペットでは、フォームID参照(2189)といくつかのフィールドID参照(2、30、33)があることに注意することが重要です。 これらのID番号を、あなたのフォームとフィールドのIDに合わせて更新する必要があります。ID番号の見つけ方については、こちらのチュートリアルをご覧ください。
上のスニペットでは、この関数はまずフォームIDが次のように一致することを確認します。 2189もしそうでなければ、このスニペットは実行されない。
スニペットの次の部分では 名称 フィールド(これはフィールドID 2)は空ではありません。 フォームを設定したので 名称 フィールドが必須フィールドであるため、このフィールドが空になることはないとわかっていますが、それでもバリデーション・チェックのためにこのフィールドを入れています。
スニペットを続行したら、最初の隠しフィールド(フィールドID 30)を現在の日付に置き換える。
そして最後に、現在の日付に1年を加え、その新しい日付を2番目の隠しフィールド(フィールドID 33).
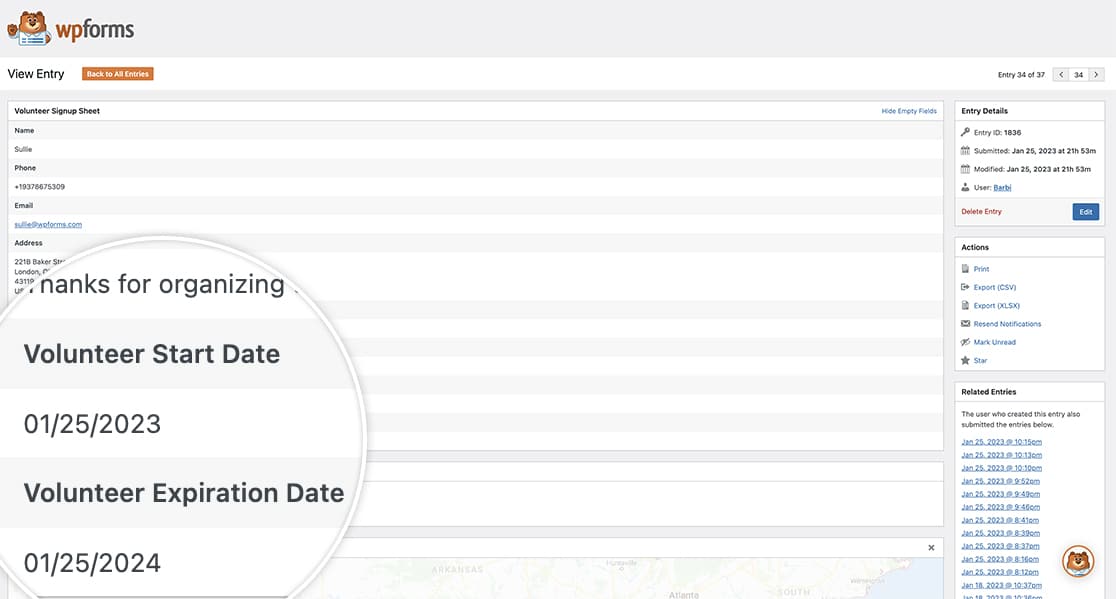
エントリーを表示すると、フォーム送信の元の日付と、送信の有効期限となる新しい日付がはっきりとわかります。

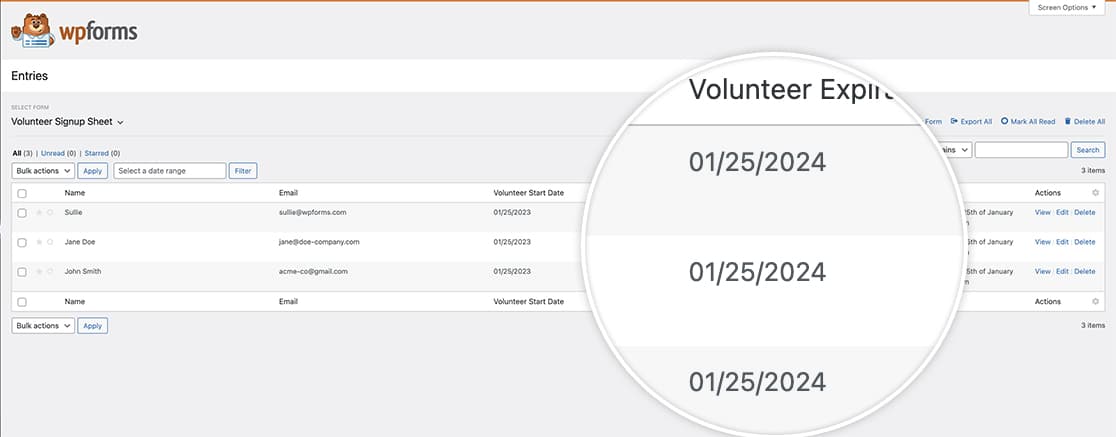
このドキュメントのガイドに従って、エントリー画面のデフォルト表示を変更し、すべてのエントリーを表示する際にこれらの日付を簡単に確認できるようにすることもできます。

これで完了です!これで、エントリーの日付からちょうど1年後の新しい日付が追加・保存されました。フィールドの値もエントリーに保存したいですか?WPFormsのエントリーにフィールド値を保存する方法のチュートリアルをご覧ください。
