AIサマリー
はじめに
支払いフォームのラベルをカスタマイズして、ラベルの後に価格を表示することを選択したときに表示されるハイフンを削除したいですか?支払いフィールドのデフォルトの動作では、ラベルと表示価格の間にハイフンが含まれています。
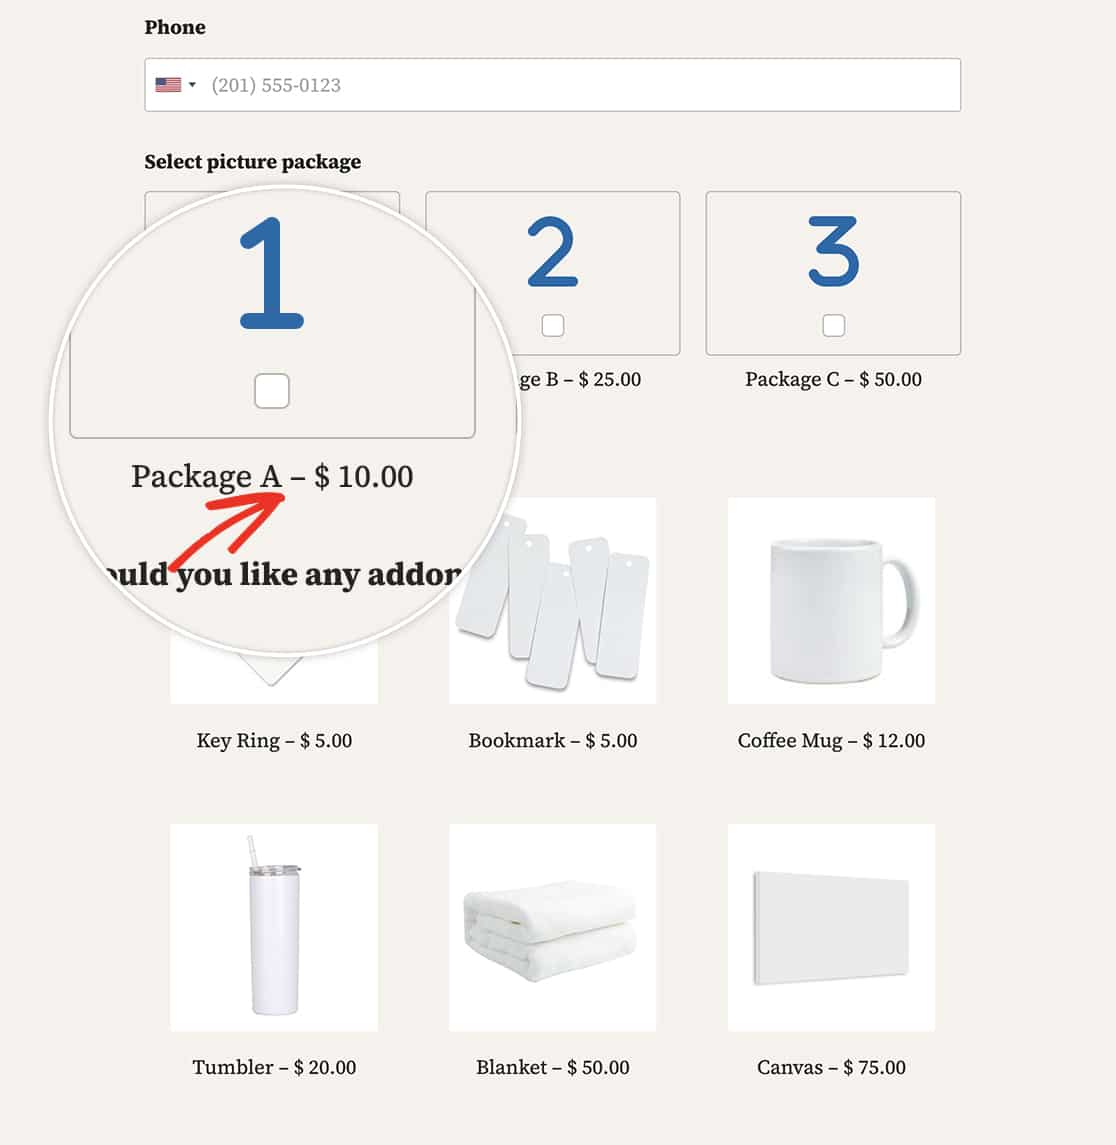
ご心配なく!このチュートリアルでは、支払いフィールドのラベルをカスタマイズする方法を説明します。ハイフンを完全に削除したい場合も、別の文字に置き換えたい場合も、お任せください。スニペットなしとPHPベースの2つの方法で、フォームの美観に合ったラベルと価格表示を簡単に実現しましょう。
フォームの作成
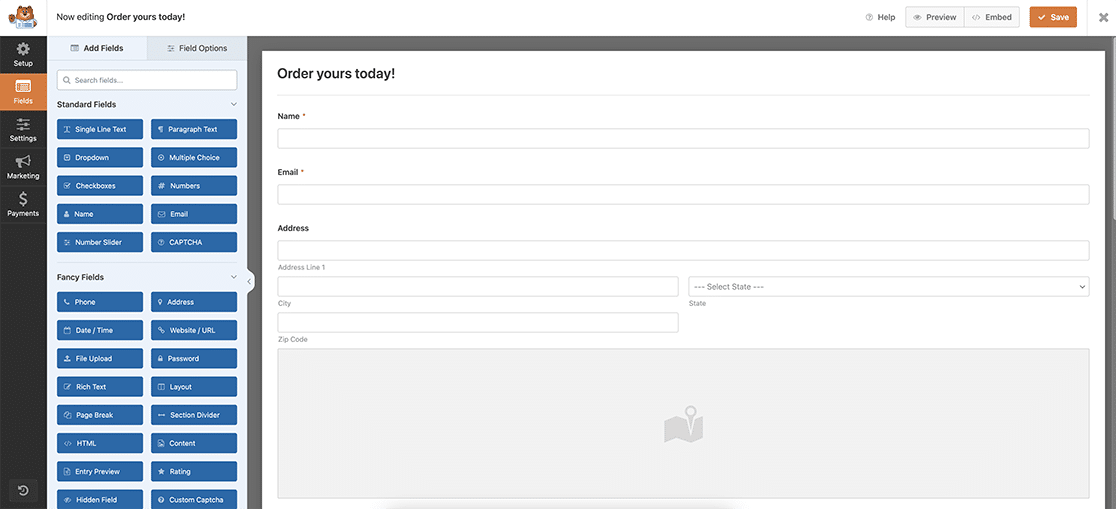
まずはじめに、支払いを受け付けるすべての必須フィールドを備えた標準的な注文フォームを作成します。このタイプのフォームを作成する際にサポートが必要な場合は、こちらの便利なガイドをご覧ください。
ハイフンの削除
方法1:スニペットなし
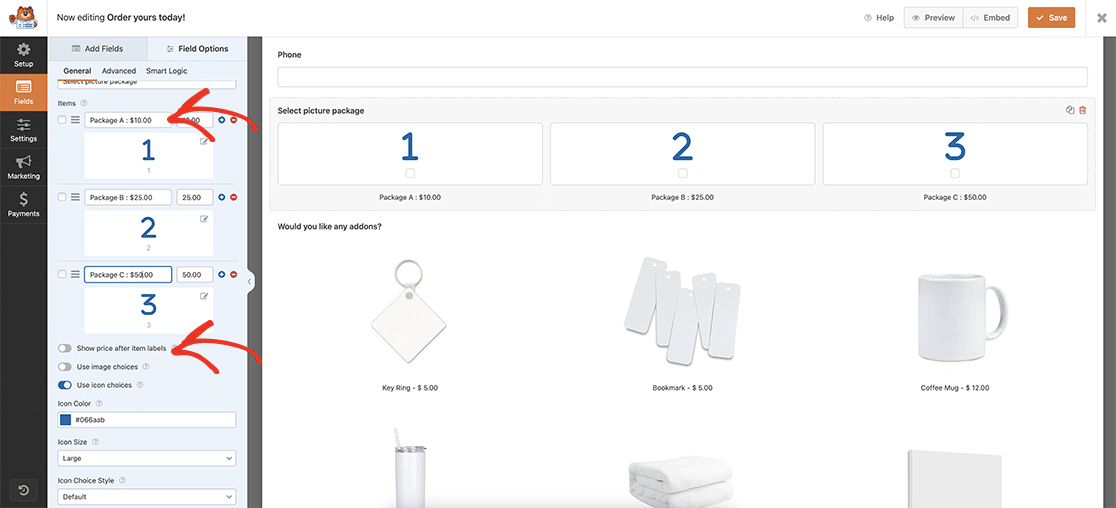
お約束したように、ハイフンを完全に削除しても価格を表示したい場合は、手動でラベルを正確に入力してください。
この方法では、コードスニペットは必要ありません。また、「アイテムラベルの後に価格を表示」が無効になっていることも確認してください。この例で行ったように、ハイフンなしでも、ハイフンをコロンに置き換えてもかまいません。
方法2:PHPベース
PHPを使用してこのハイフンを削除または変更したい場合は、まず支払いフィールドをクリックし、各フィールドの詳細設定タブで、項目ラベルの後に価格を表示するをクリックし、フォームがハイフンで区切られた項目のラベルと価格を自動的に配置するようにします。
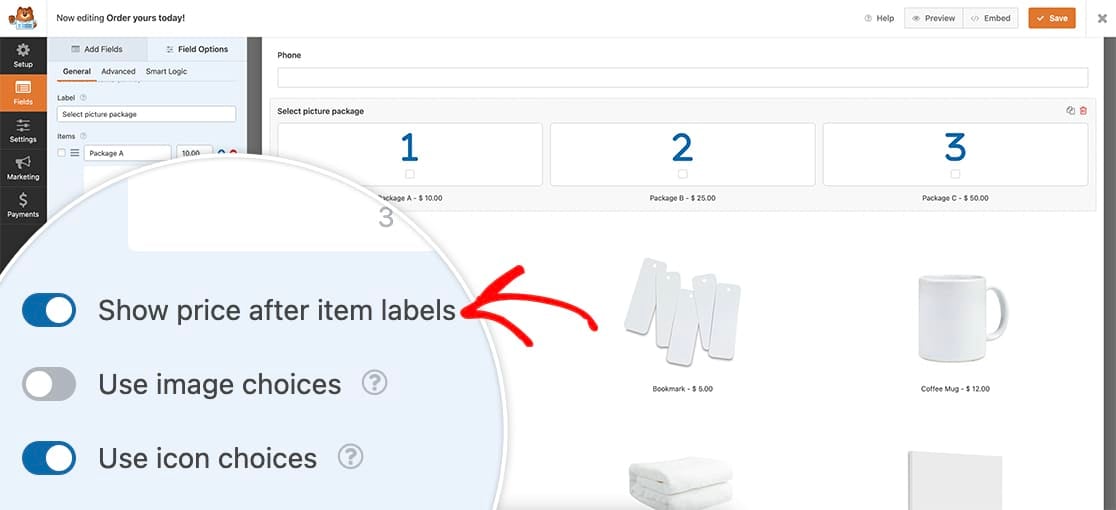
フォームが保存されたら、次はスニペットを追加します。このスニペットをコピーしてサイトに貼り付けるだけです。
/**
 * Remove or change hyphen payment form labels
 *
 * @link https://wpforms.com/developers/how-to-customize-payment-form-labels/
 */

function wpf_remove_hyphen_separator() {
    ?>
    <script>
        document.addEventListener( 'DOMContentLoaded', function() {

			// The querySelectorAll targets all Payment fields:
			// .wpforms-image-choices-label is for Multiple / Checkbox Items with image choices turned on
			// .wpforms-icon-choices-label is for Multiple / Checkbox Items with icon choices turned on
			// .wpforms-field-payment-checkbox input + .wpforms-field-label-inline is for Checkbox Items without icon or image choices - in this case we know the label follows the checkbox input which allows us to target it only for this case
			// .wpforms-field-payment-multiple input + .wpforms-field-label-inline is for Multiple Items without icon or image choices - same as above
			// .wpforms-field-payment-select option is for Dropdown Items (both Classic and Modern)

			var labelElements = document.querySelectorAll( ".wpforms-image-choices-label, .wpforms-icon-choices-label, .wpforms-field-payment-checkbox input + .wpforms-field-label-inline, .wpforms-field-payment-multiple input + .wpforms-field-label-inline, .wpforms-field-payment-select option" );
            labelElements.forEach(function(labelElement) {
                labelElement.textContent = labelElement.textContent.replace(' – ', ' : ');
            });
        });
    </script>
    <?php
}

add_action( 'wpforms_wp_footer_end', 'wpf_remove_hyphen_separator', 10 );
このスニペットは、支払いフィールドを検索し、ハイフン(-)を コロン(:)に置き換えます。
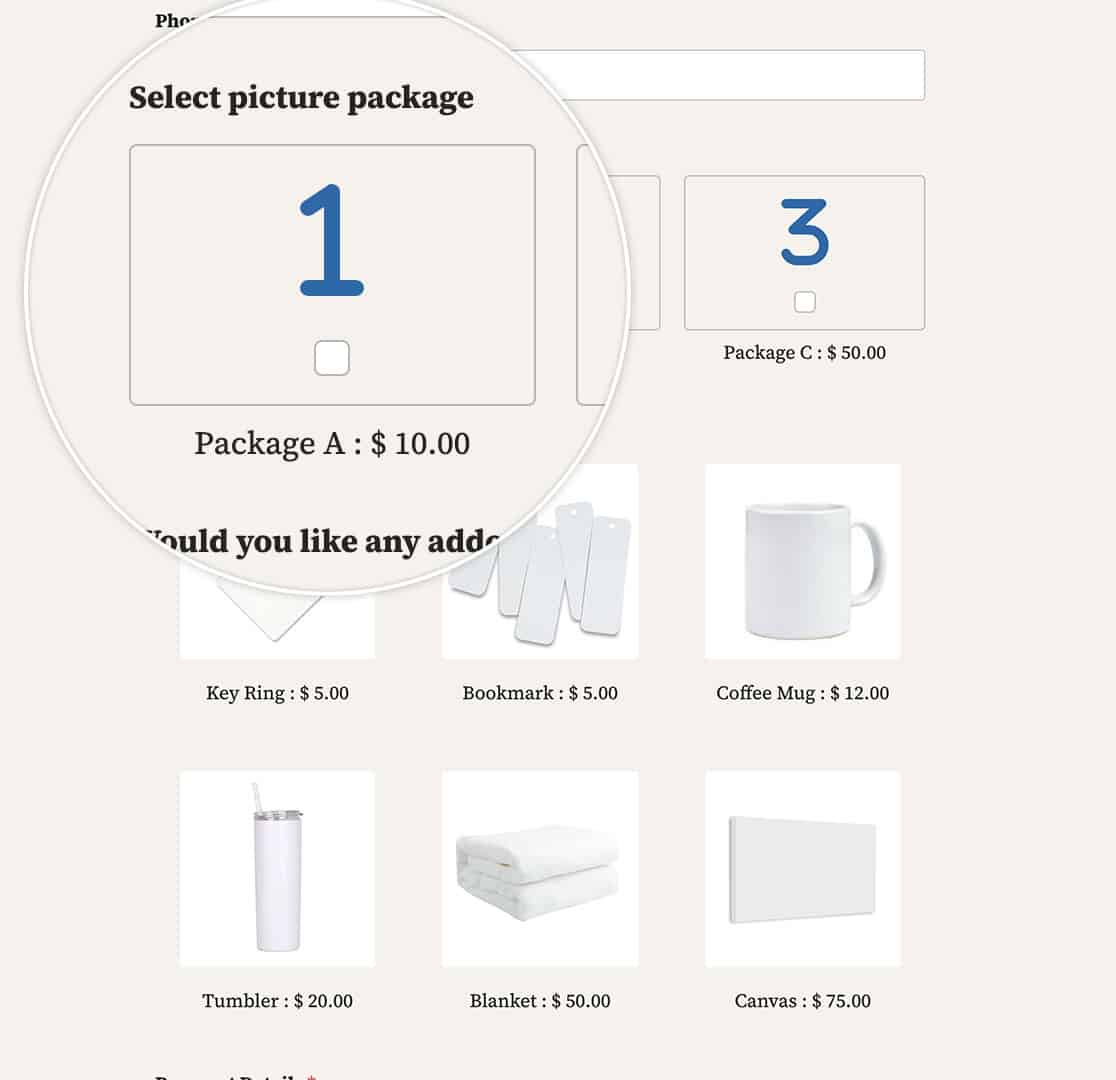
以上で支払いフォームのラベルのカスタマイズは完了です!この変更をEメール通知にも適用したいですか?メール通知内の支払い区切り文字を変更する方法をご覧ください。
関連
アクション・リファレンス:wpforms_wp_footer_end
よくあるご質問
Q:セパレーターをまったく使いたくない場合は、何を使えばいいですか?
A:ラベルと価格の間にスペースを空けるには、次のスニペットをお使いください。
/**
 * Remove or change hyphen payment form labels
 *
 * @link https://wpforms.com/developers/how-to-customize-payment-form-labels/
 */

function wpf_remove_hyphen_separator() {
    ?>
    <script>
        document.addEventListener( 'DOMContentLoaded', function() {

			// The querySelectorAll targets all Payment fields:
			// .wpforms-image-choices-label is for Multiple / Checkbox Items with image choices turned on
			// .wpforms-icon-choices-label is for Multiple / Checkbox Items with icon choices turned on
			// .wpforms-field-payment-checkbox input + .wpforms-field-label-inline is for Checkbox Items without icon or image choices - in this case we know the label follows the checkbox input which allows us to target it only for this case
			// .wpforms-field-payment-multiple input + .wpforms-field-label-inline is for Multiple Items without icon or image choices - same as above
			// .wpforms-field-payment-select option is for Dropdown Items (both Classic and Modern)

			var labelElements = document.querySelectorAll( ".wpforms-image-choices-label, .wpforms-icon-choices-label, .wpforms-field-payment-checkbox input + .wpforms-field-label-inline, .wpforms-field-payment-multiple input + .wpforms-field-label-inline, .wpforms-field-payment-select option" );
            labelElements.forEach(function(labelElement) {
                labelElement.textContent = labelElement.textContent.replace(' – ', '  ');
            });
        });
    </script>
    <?php
}

add_action( 'wpforms_wp_footer_end', 'wpf_remove_hyphen_separator', 10 );
これらのスニペットで変更されたのは、次の行だけだ。 replace(' – ', ' : '); これを replace(' – ', ' ');ここでは、セパレーターとしてスペースを1つ空けている。
