Would you like to set up hCaptcha to help prevent spam submissions in your WordPress forms? hCaptcha is a free, privacy-conscious alternative to Google’s reCAPTCHA that offers reliable anti-spam protection.
This tutorial will show you how to set up and use hCaptcha in WPForms.
In This Article
Before you dive in, make sure WPForms is installed and activated on your WordPress site and that you’ve verified your license.
1. Generating hCaptcha Keys
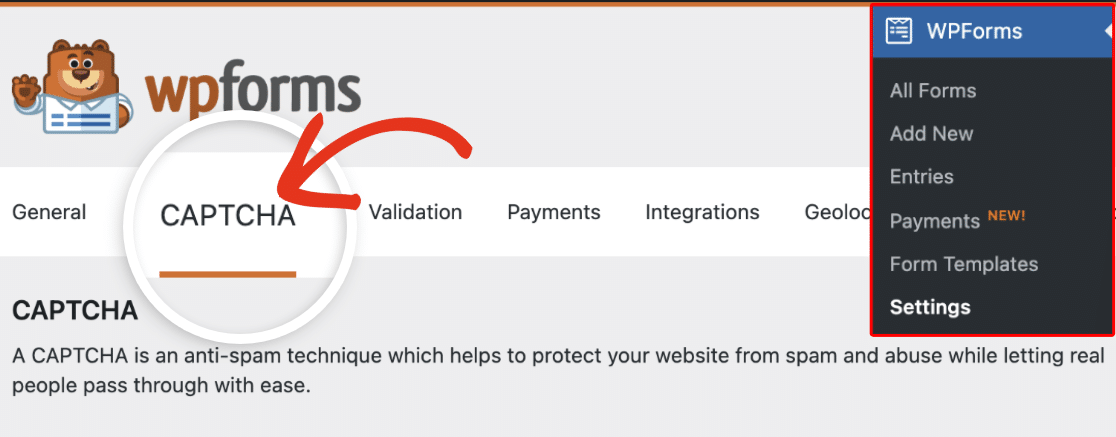
To get started, log in to your WordPress site and go to WPForms » Settings. Then click on the CAPTCHA tab.
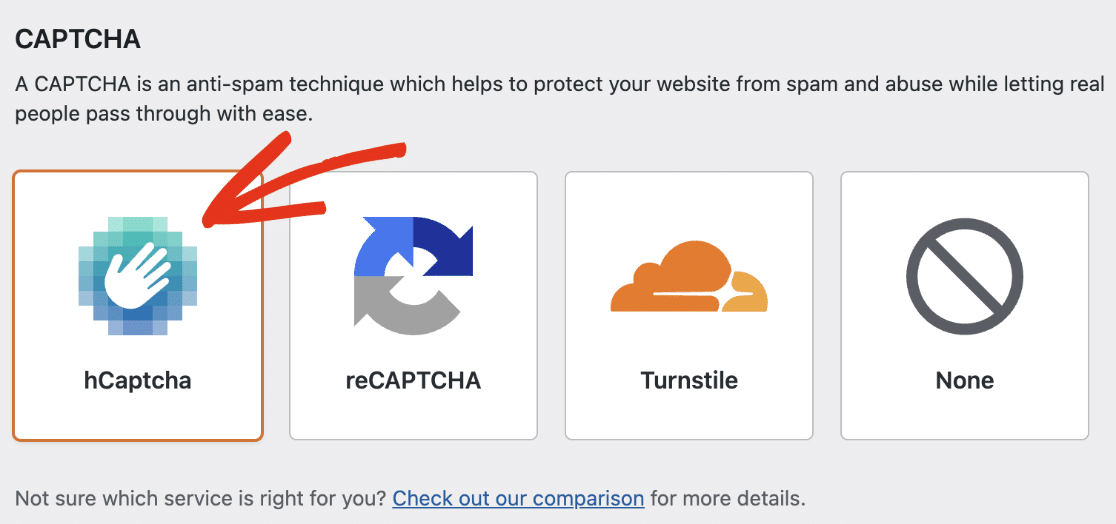
To configure hCaptcha on your site, select the hCaptcha option.
Next, you’ll need to generate a new set of keys in your hCaptcha account to connect it to WPForms. Leave this browser tab open and proceed to the next step.
Adding a New hCaptcha Sitekey
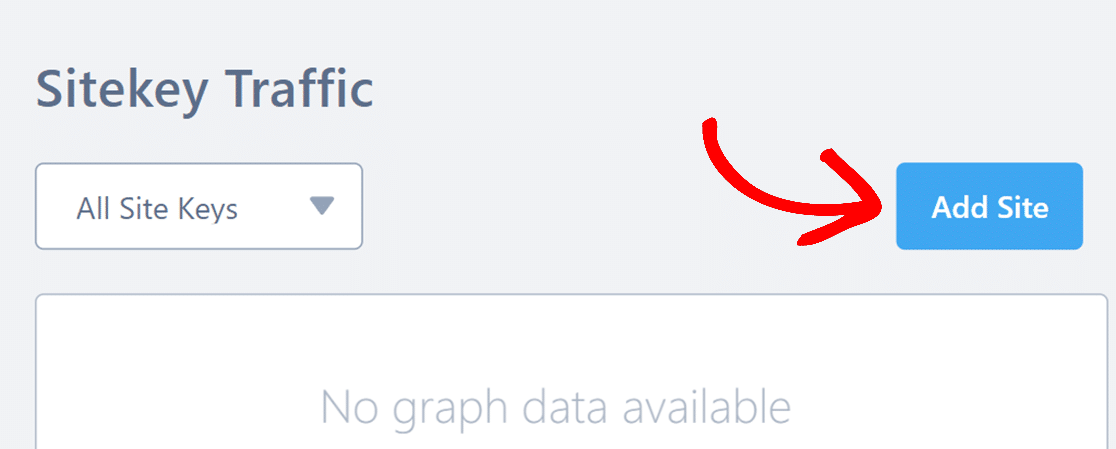
To start this setup process, log in to your hCaptcha account. Once you’ve logged in to hCaptcha, click the Add Site button in the upper right corner.
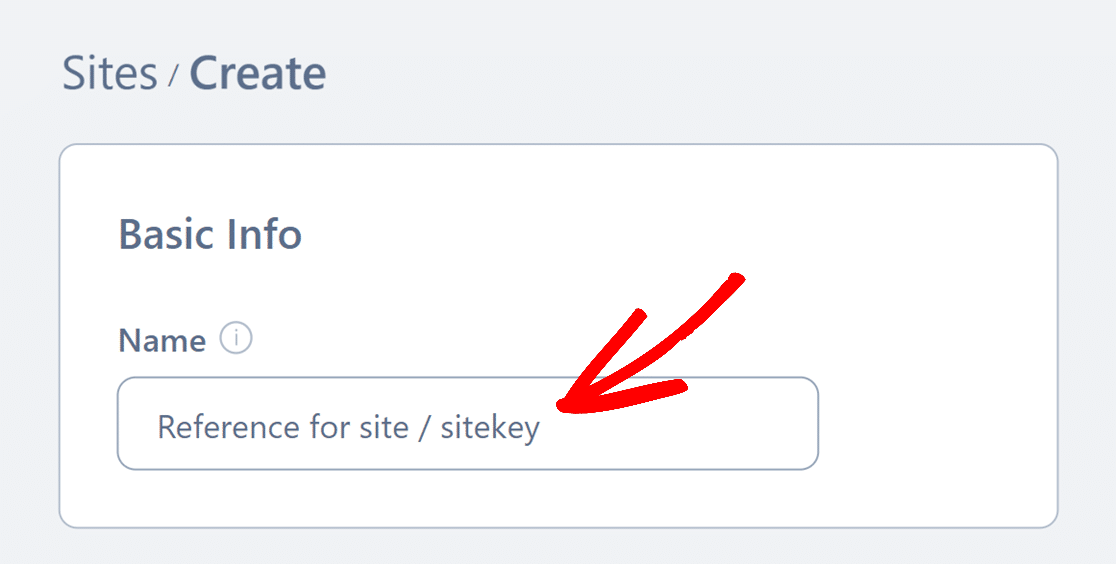
This will open the setup form for your hCaptcha. If you’d like, you can add a name to this specific sitekey in the Name field under the Basic Info section. This is for your reference only, and won’t be seen by your users on the frontend.
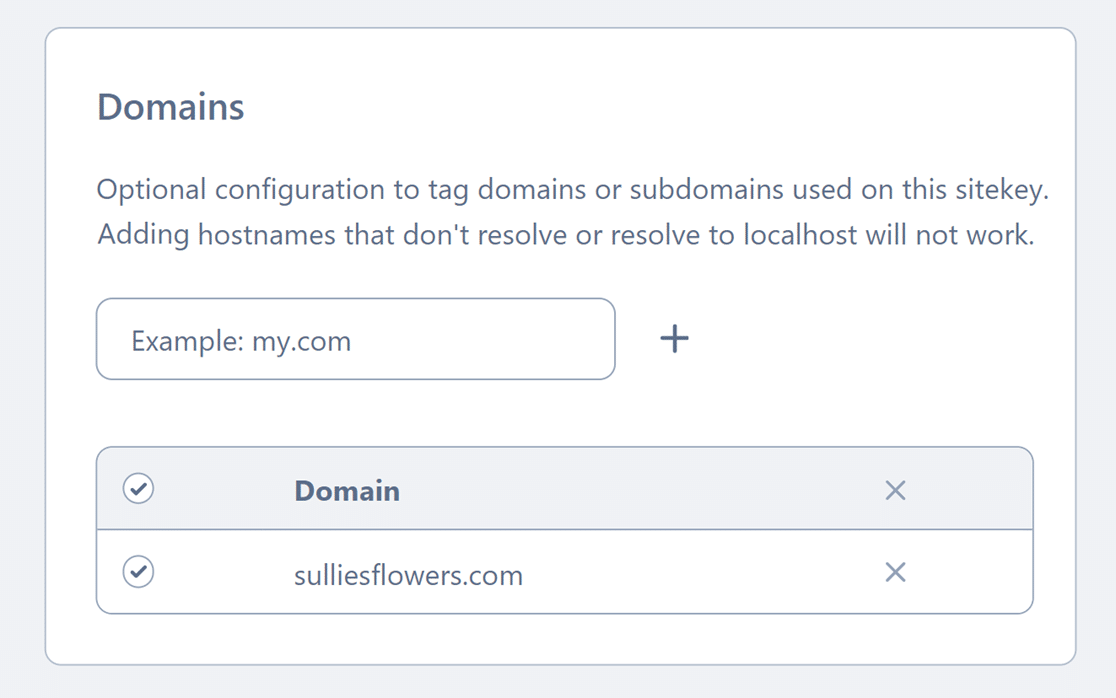
Then, under the Domains section, you can add the URL of each site you’ll be activating hCaptcha on.
Next, you’ll need to choose the default CAPTCHA behavior in the hCaptcha Behavior section. The Always Challenge mode is the default option. This setting will show a CAPTCHA challenge before users submit a form on your website.
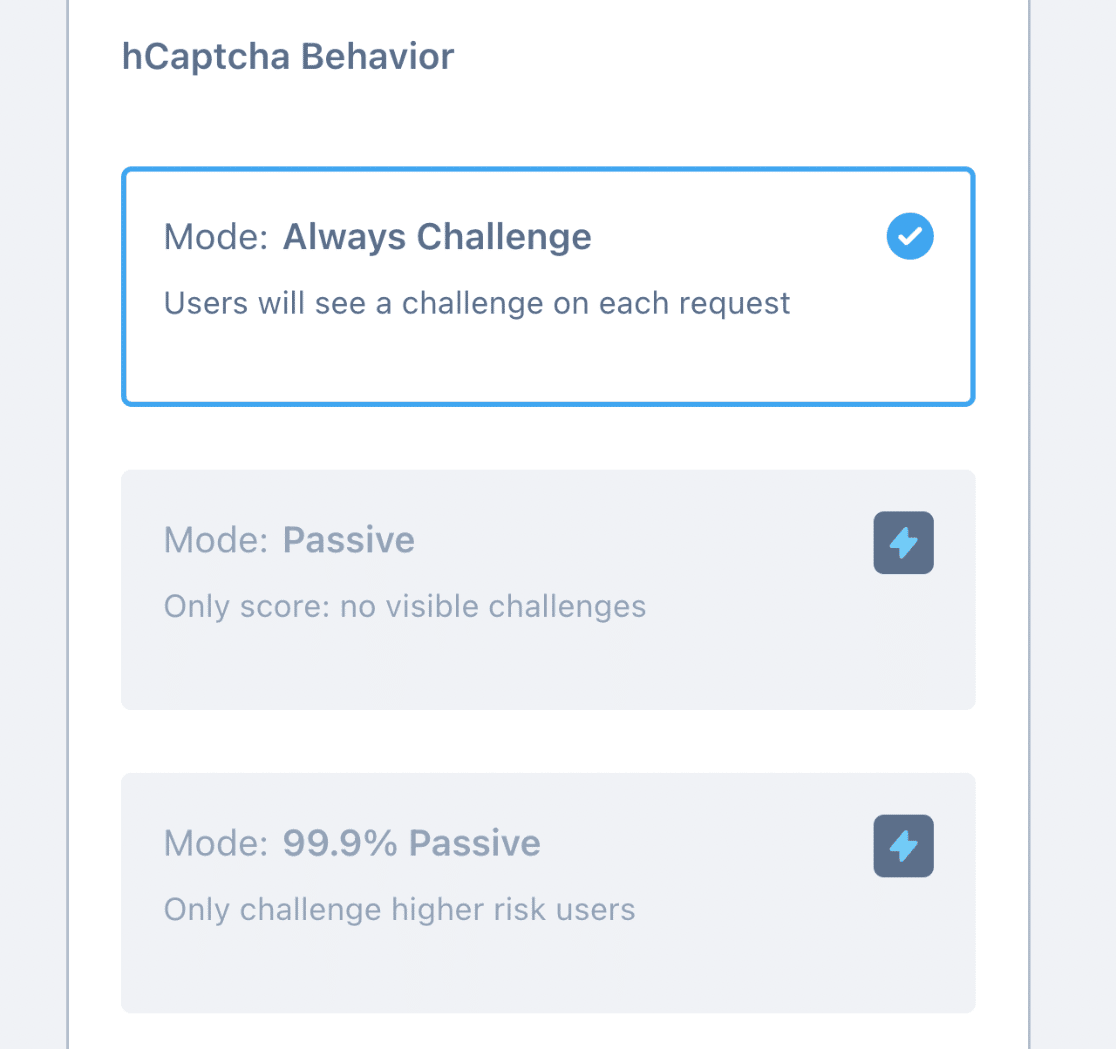
The Passive mode doesn’t display any challenge on the frontend. Instead, it uses a score to determine and prevent spam submissions on your form.
Note: You’ll need to upgrade your hCaptcha account to use the Passive and 99% Passive modes.
Below that, you’ll see the Passing Threshold option. This setting allows you to choose the difficulty level of the hCaptcha within your forms. For example, if you choose the Difficult passing threshold, it’ll show harder challenges to users.
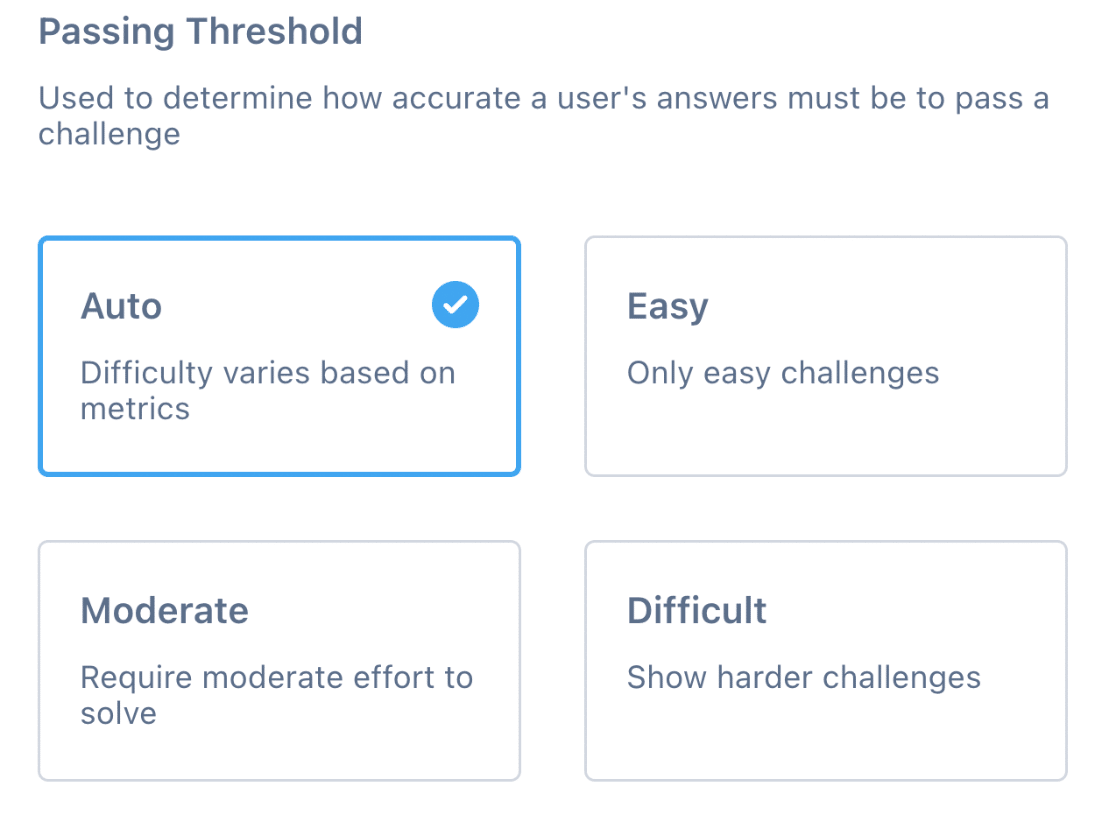
Go ahead and choose Auto for the passing threshold. Setting the threshold to Auto will vary the difficulty based on user behavior on your website.
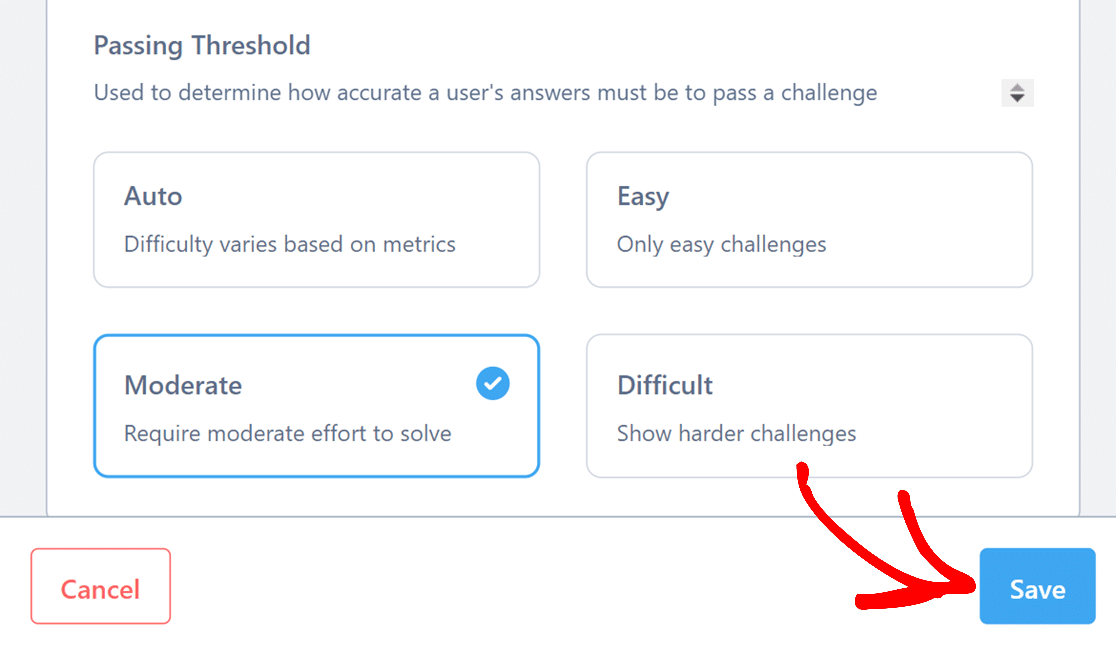
Once you’ve configured your settings, be sure to click the Save button at the bottom of the screen to save your settings.
Copying Your hCaptcha Sitekey
Next, you’ll be redirected to the Sites page where all your sitekeys will be listed. To quickly copy the sitekey you’ve just created, simply click on the name of your sitekey directly from the list.
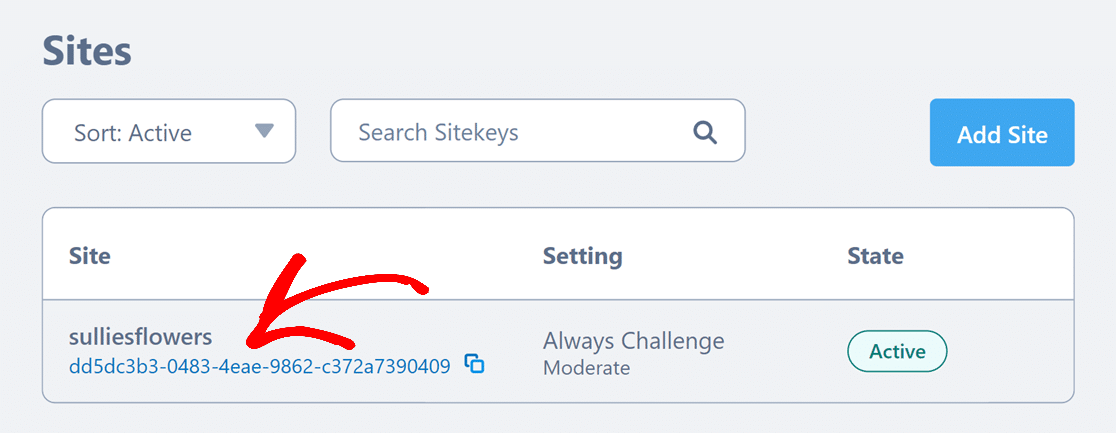
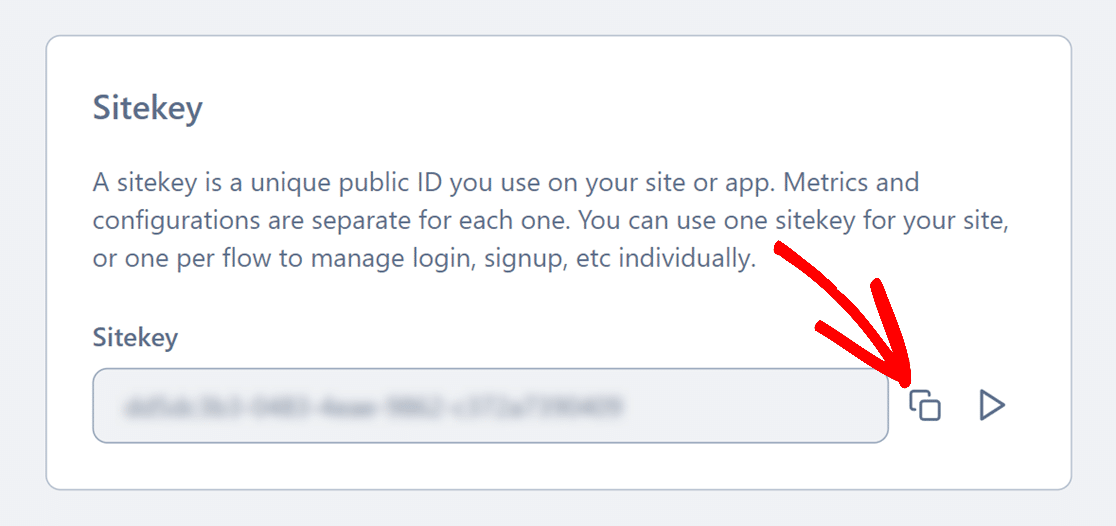
Alternatively, you can click anywhere on the sitekey’s row to open the detailed settings page. Once you’ve opened these settings, you can view your full sitekey under the Sitekey section. Click on the Copy icon to copy it.
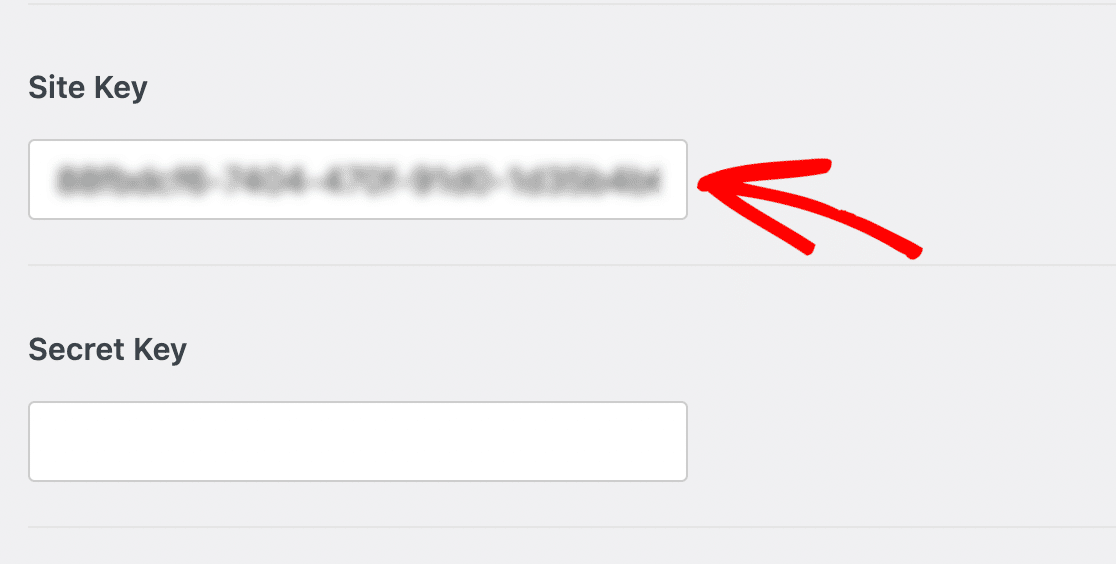
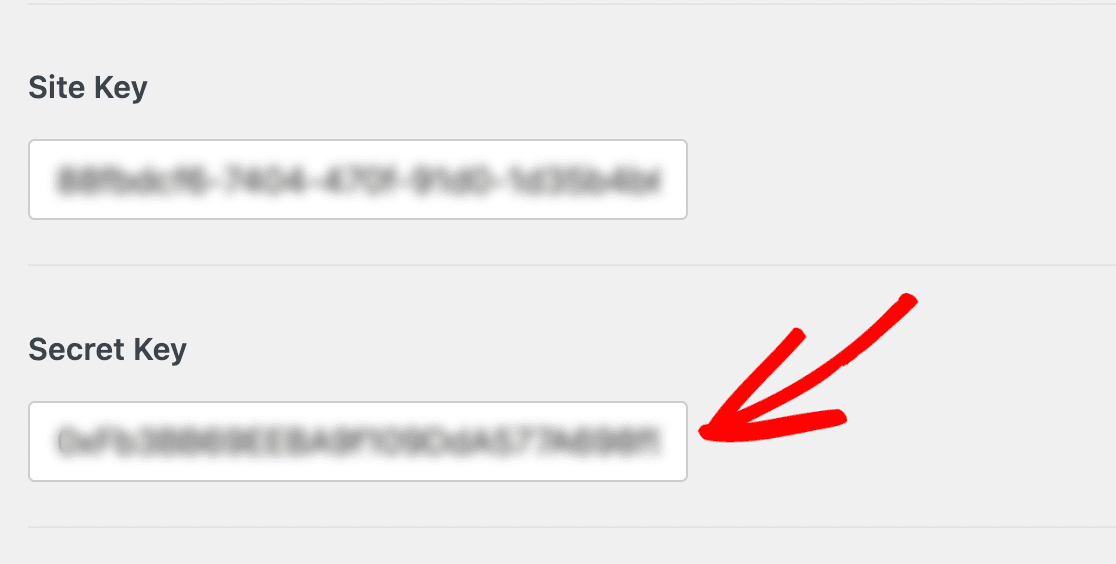
After you’ve copied it, head back to the WPForms settings page and paste your sitekey in the Site Key field.
Next, you’ll need to copy and paste your Secret key from hCaptcha into your WPForms settings.
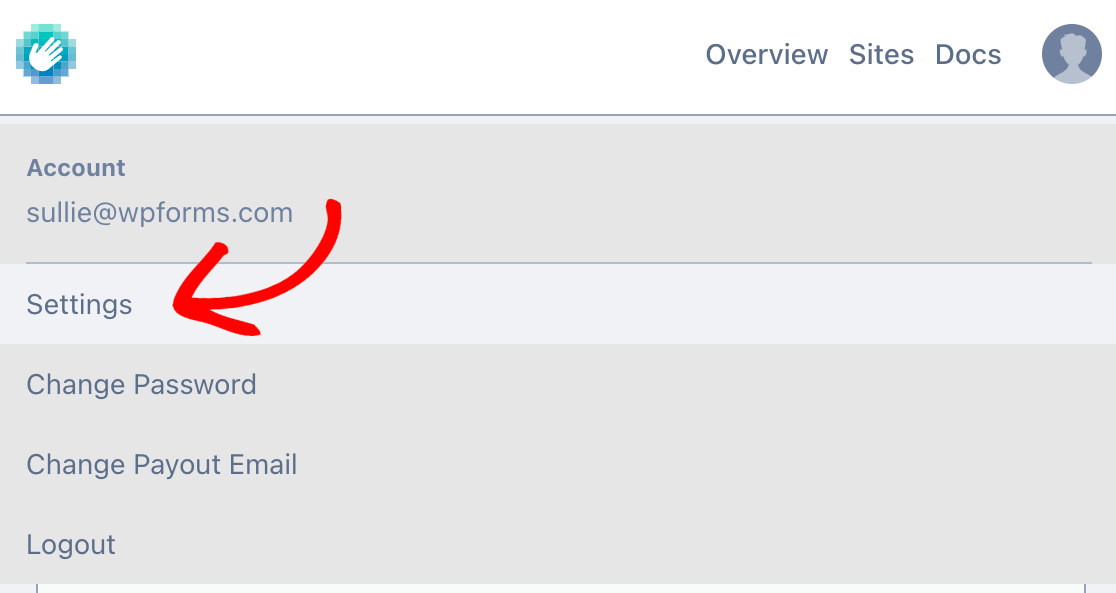
To get your Secret key, open the hCaptcha tab and click on your avatar in the top right corner of the screen to open your account menu. Then click on Settings.
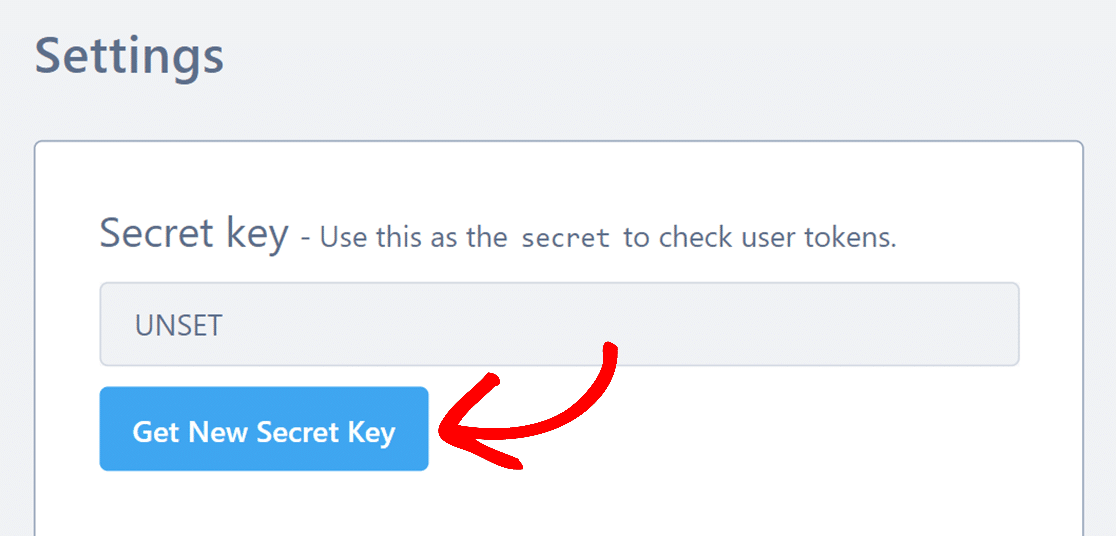
Next, click on the Get New Secret Key button from the Secret key section on this screen.
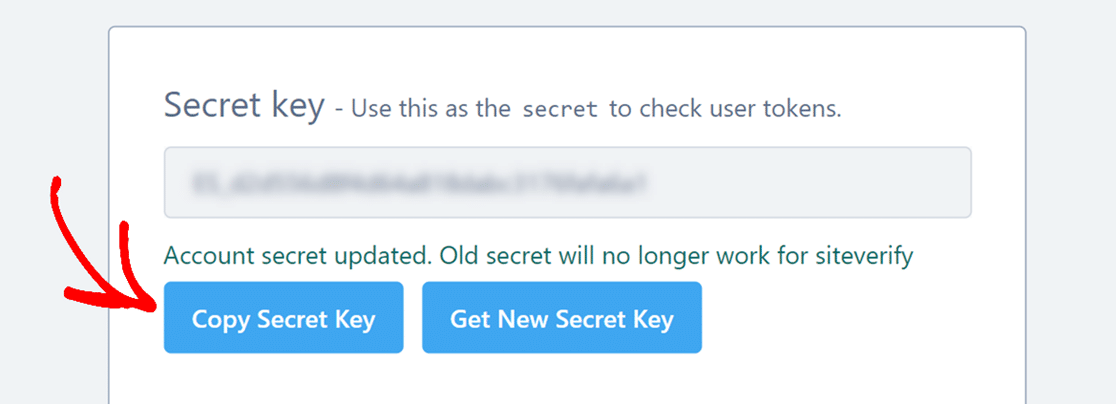
Then, click on the Copy Secret Key button to copy the new secret key you just created.
Next, go ahead and paste this secret key into your WPForms settings. Be sure to click the Save Settings button to save your keys when you’re done.
Configuring Additional hCaptcha Settings
Once you’ve added your keys, you can also optionally adjust other hCaptcha settings. We’ve outlined each available option below.
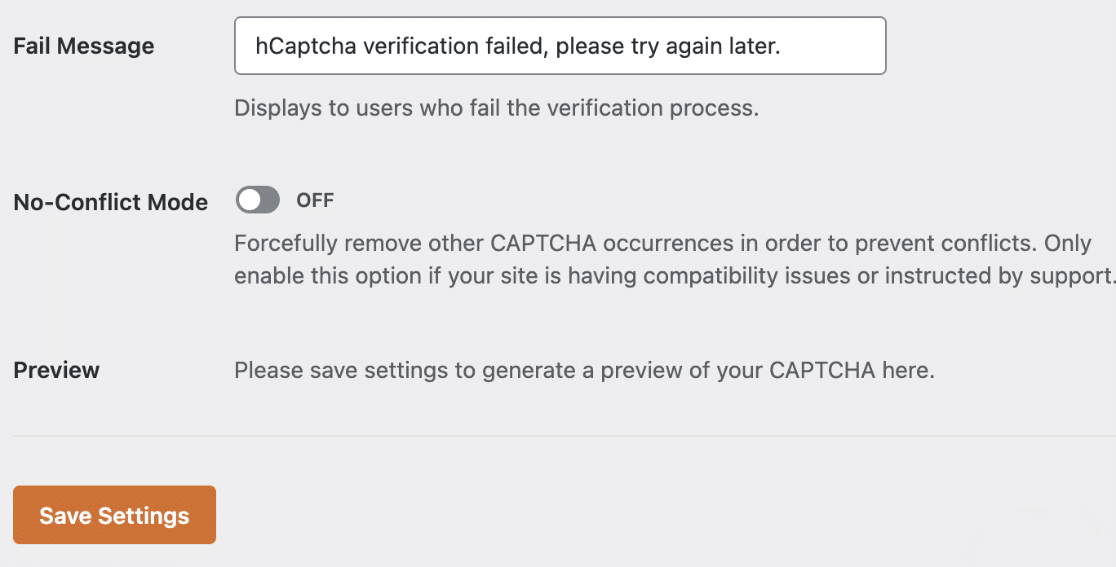
- Fail Message: This error will display to any user who does not pass hCaptcha’s verification test.
- No-Conflict Mode: If several CAPTCHAs are being loaded on your site (for example, by both WPForms and your WordPress theme), this can prevent hCaptcha from working properly. No-conflict mode will remove any CAPTCHA code that’s not loaded by WPForms. However, we highly recommend getting in touch with our support team if you’re at all unsure whether to use this option.
- Preview: This setting will show a preview of your hCaptcha. If any of your settings are configured incorrectly, you’ll see an error message in the preview. This means you should double-check that your keys are copied correctly in your settings.
2. Adding hCaptcha to a Form
Now that you’ve set up your keys, you’ll be able to add hCaptcha to any of your forms.
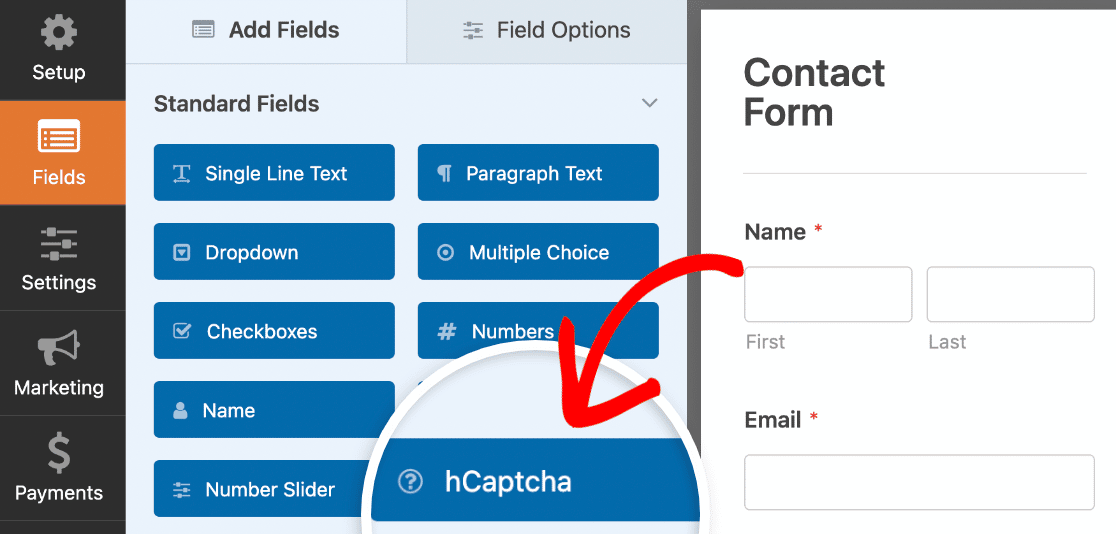
To do so, create a new form or edit an existing one. After you’ve opened the form builder, look under Standard Fields and click on the hCaptcha field.
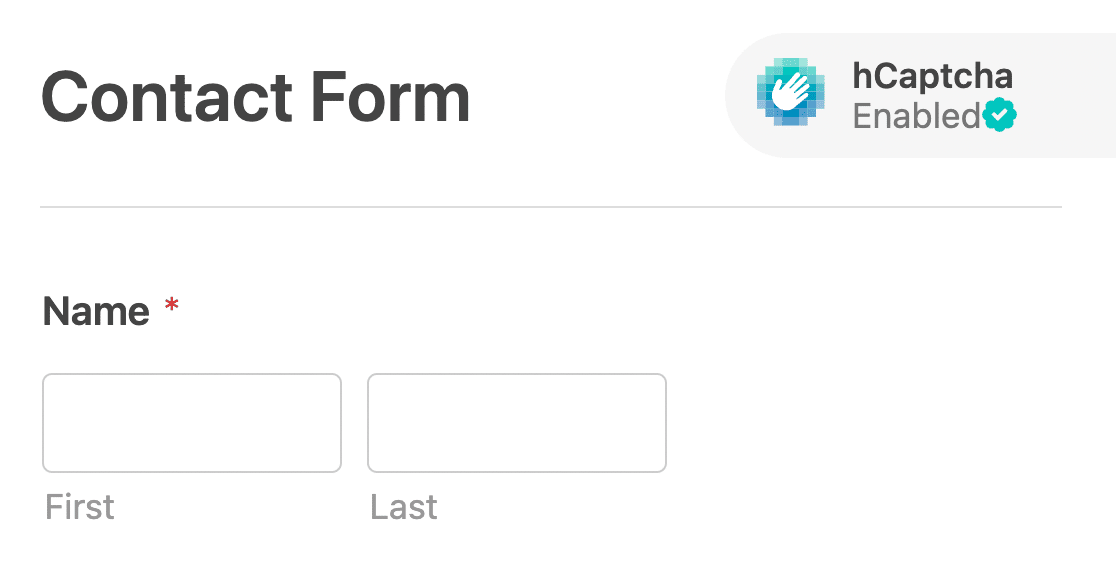
To confirm that hCaptcha is enabled, look for the badge in the upper right corner of the form builder.
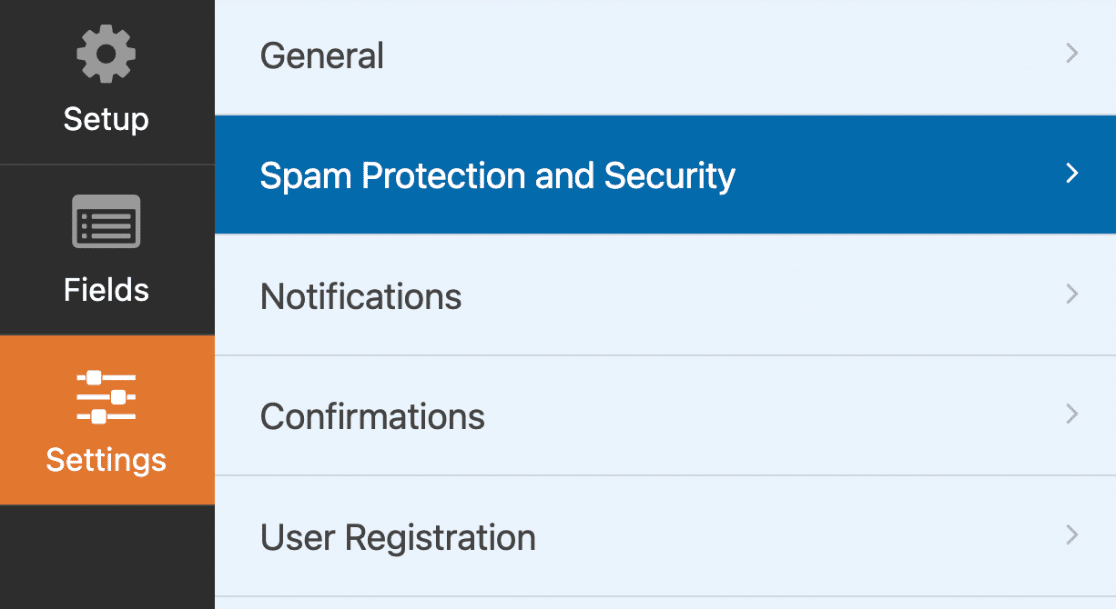
Alternatively, you can always turn hCaptcha on or off for a form by going to Settings » Spam Protection and Security in the form builder.
Under the Protection section, you can enable the Store spam entries in the database option if you’d like to review spam entries before deleting them from the entries page.
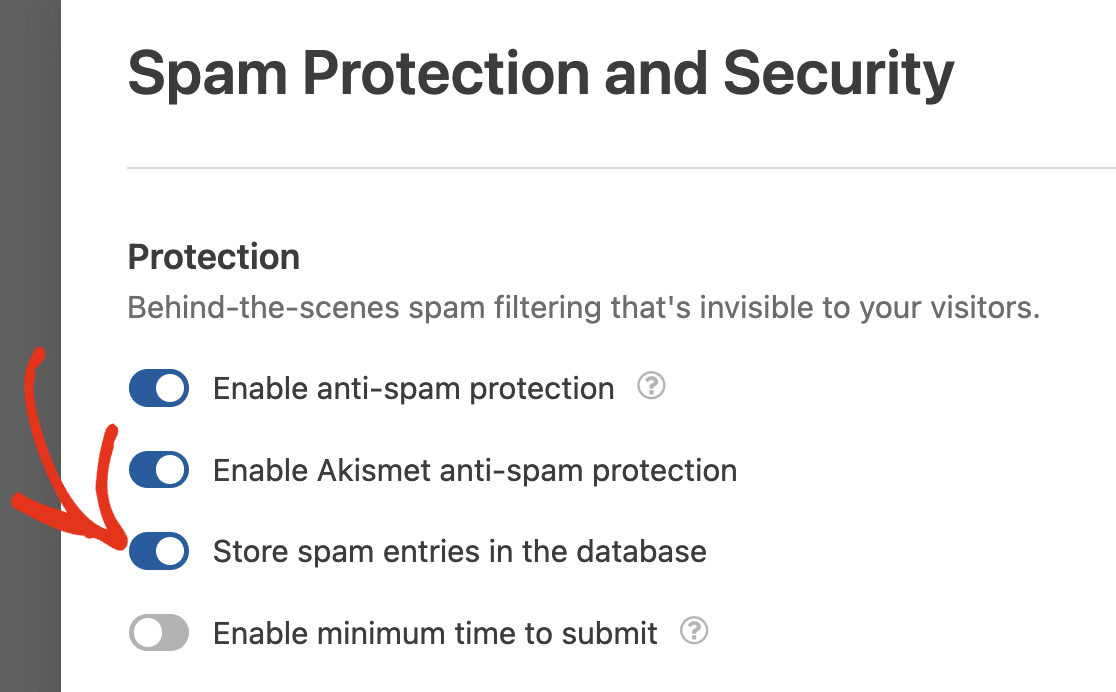
Enabling this option allows all submissions, including those flagged as spam by hCaptcha.
Note: The Enable minimum time to submit option helps prevent bot submissions by setting a minimum time before submissions are allowed on the form. See our spam prevention guide for more details.
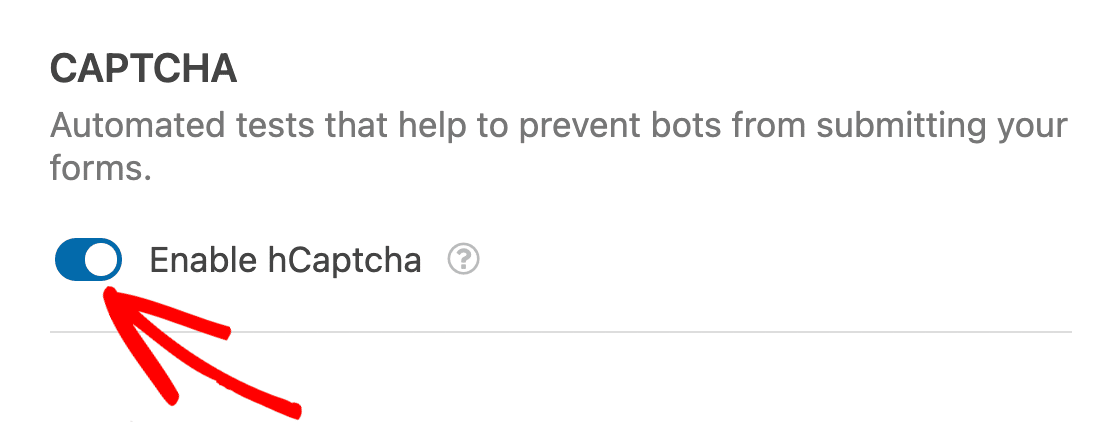
Next, scroll down to the CAPTCHA section and toggle the Enable hCaptcha option to the on position.
Note: If no badge appears in your form builder, ensure you’ve correctly set up your hCaptcha keys.
3. Testing hCaptcha
The last step is to run a quick test to ensure that hCaptcha looks and works how you expect.
To test it out, you’ll simply need to submit an entry to your form. For more details on how to test out your forms, please take a look at our full testing checklist.
4. Viewing Spam Entries
If you enabled the spam entry storage option, you’ll be able to view entries identified as spam from the Entries page.
There is also an option to recover entries that may have been mistakenly flagged as spam by hCaptcha.

For a detailed guide, please see our tutorial on viewing and managing spam entries.
That’s it! Now you know how to set up and use hCaptcha in WPForms.
Next, would you like to block users with certain email addresses from submitting your forms? Be sure to check out our tutorial on how to create an allowlist or denylist for more details.
