### [Setting Up Square Webhooks](https://wpforms.com/docs/setting-up-square-webhooks/)
**Published:** April 21, 2025
**Author:** Umair Majeed
**Excerpt:** Learn how to set up Square webhooks.
**Content:**
Would you like WPForms to receive real-time updates when a payment is completed or refunded through Square? With Square webhooks enabled, your forms can stay in sync with Square so payment statuses are always up to date.
This guide will show you how to easily connect Square webhooks with WPForms, ensuring your website stays in sync with your Square activities.
- [Understanding Webhooks](#webhooks)
- [Enabling Webhooks in WPForms](#enabling-webhooks)
- [Creating a Square Application](#create-square-application)
- [Generating and Entering Your Personal Access Token](#generating-personal-access-token)
- [Frequently Asked Questions](#faq)
---
Before you get started, be sure to [install WPForms](https://wpforms.com/docs/install-wpforms-plugin/) on your WordPress site. After that, [connect your site to your Square account](https://wpforms.com/docs/how-to-install-and-use-the-square-addon-with-wpforms/).
## Understanding Webhooks
Webhooks are a way for Square to notify WPForms when an event happens in your account, like a payment being updated or refunded. Once enabled, WPForms listens for these events so your site can reflect changes in payment status automatically.
With Square webhooks set up, you don’t need to manually check or update your form entries after a transaction is processed. Whether a payment goes through, is refunded, or partially returned, your WPForms dashboard will stay up to date based on the latest information from Square.
## Enabling Webhooks in WPForms
To get started, open your WordPress admin area and go to **WPForms » Settings**, then click the **Payments** tab.
Next, scroll down to the **Square** section. Here, toggle on the **Enable Webhooks** option.
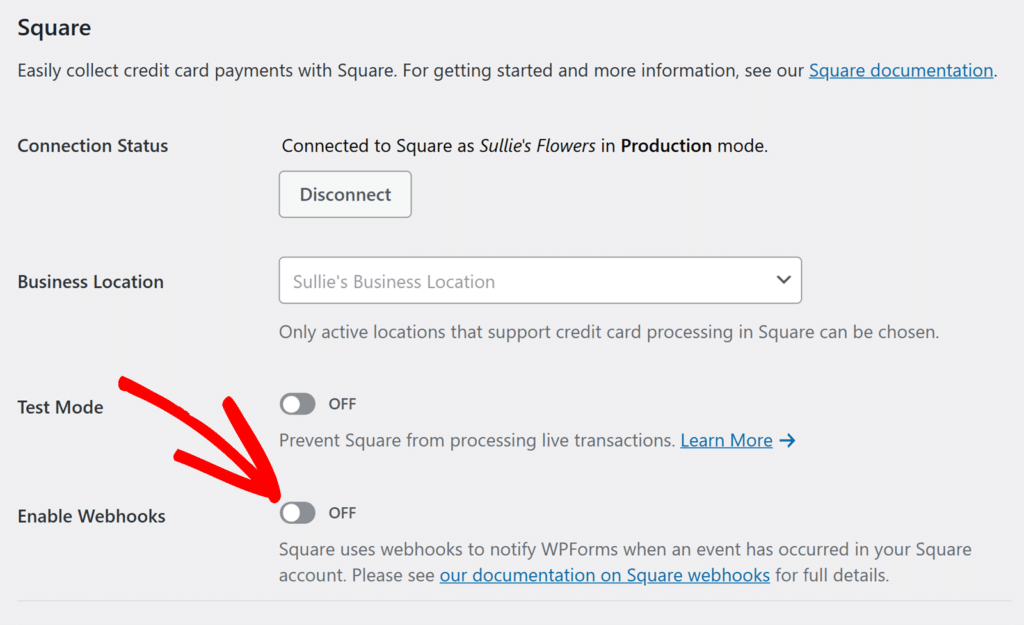This reveals a **Connect Webhooks** button underneath. Click this button to open the webhook setup prompt.
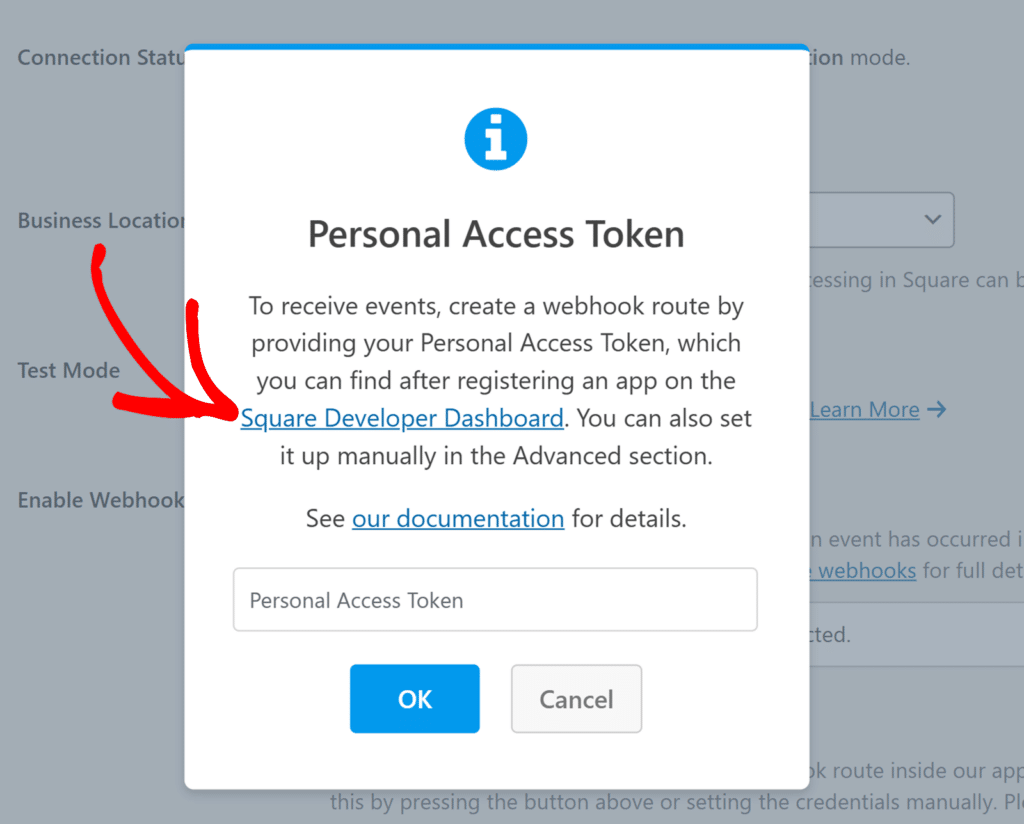
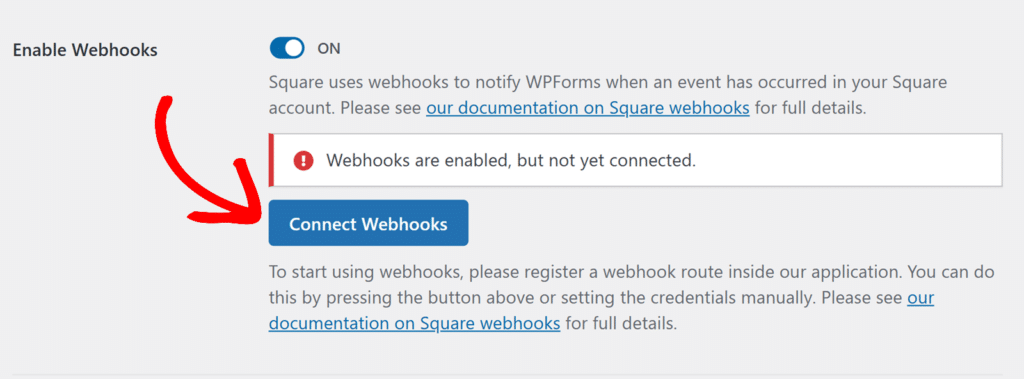You’ll now see a popup asking you to enter a **Personal Access Token**. To generate this, you’ll need to create an application in the Square Developer Dashboard.
## Creating a Square Application
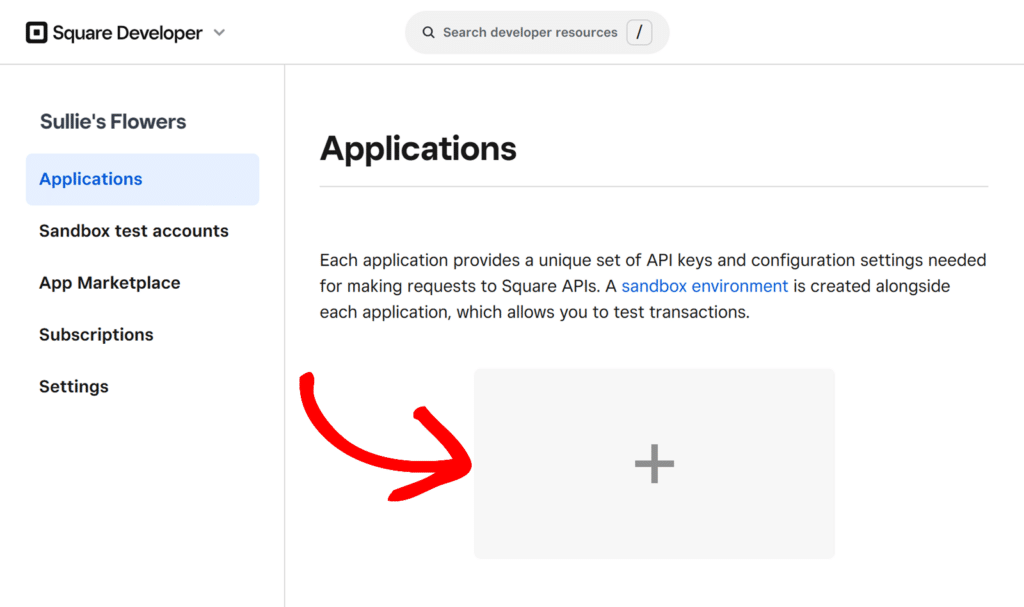
Click the **Square Developer Dashboard** link in the popup to open the Square Developer portal in a new tab.
Once there, click the **+** icon under Applications to create a new app.
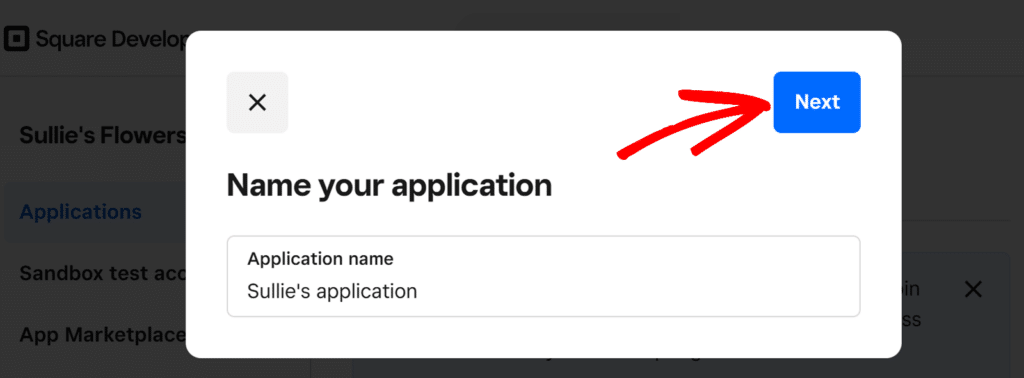
In the window that appears, enter a name for your application (this is for your own reference only), then click **Next**.
On the next screen, choose any applicable development goals, or click **Skip** to proceed directly.
Once your app is created, Square will take you to the **Credentials** screen where you’ll need to copy the Personal Access Token and paste in WPForms.
## Generating and Entering Your Personal Access Token
From the credentials screen, locate the **Access token** for your application and click **Show** next it.
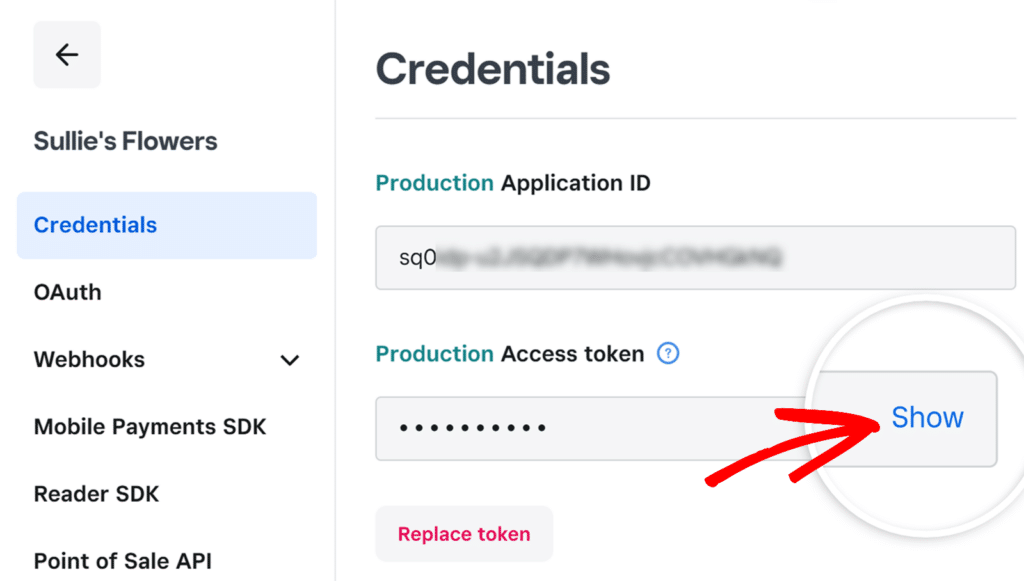**Note:** If you’re currently using Test Mode in WPForms, be sure to copy the **Sandbox Access Token**. If Test Mode is OFF, copy the **Production Access Token** instead.
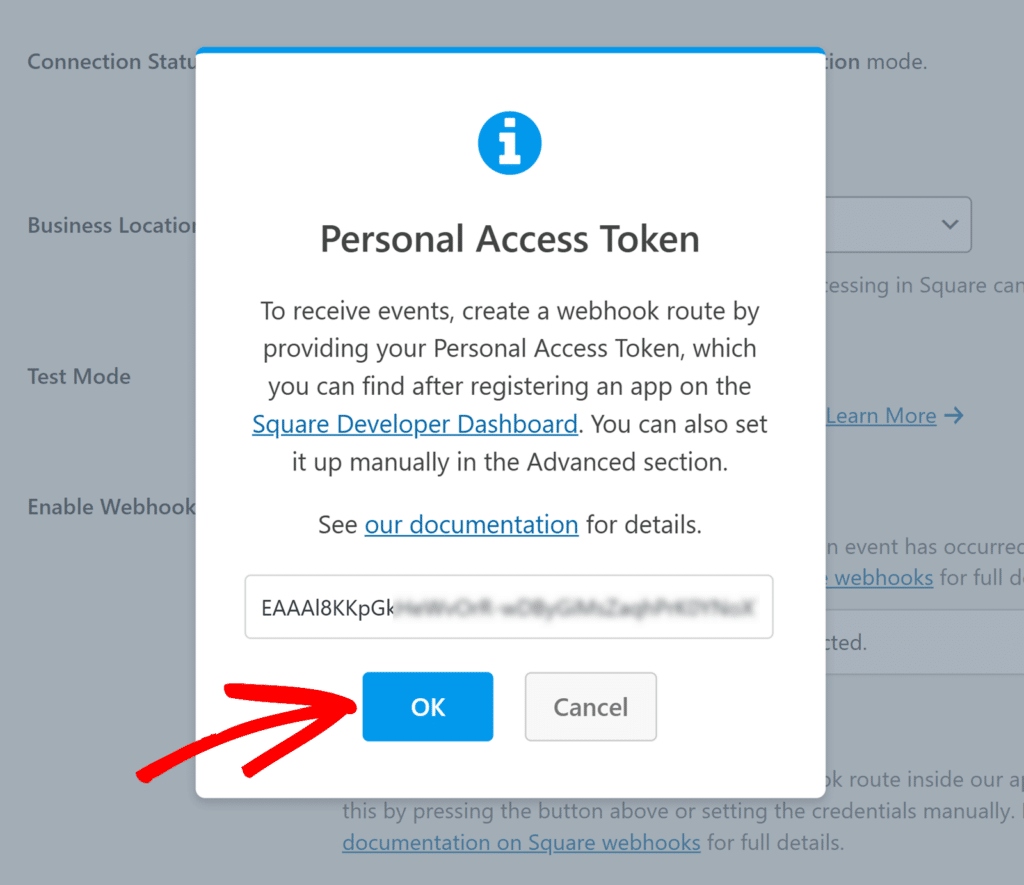
Copy the Access token. Then, return to the WPForms popup and paste the token into the **Personal Access Token** field. Once done, click **OK** to continue.
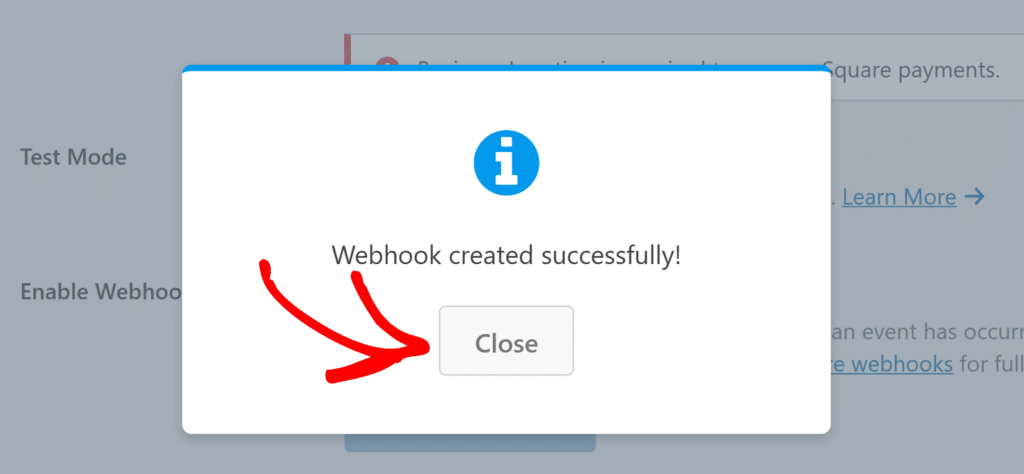
If everything is set up correctly, you’ll see a confirmation message that your webhook was created successfully. Click **Close**, and the page will refresh.
## Frequently Asked Questions
These are answers to some of the top questions we see about setting up Square webhooks in WPForms.
#### Do I need to set up webhooks for both Test Mode and Live Mode?
Yes, Square provides separate credentials for Sandbox (Test) and Production (Live) environments. Be sure to use the correct access token based on whether Test Mode is enabled in your WPForms settings.
That’s it! Now you know how to set up Square webhooks with WPForms.
Next, would you like to learn more about managing payments in WPForms? Check out our tutorial on [creating payment forms in WPForms](https://wpforms.com/docs/how-to-create-a-payment-form-in-wpforms/) for further information.
**Categories:** Payments, Payment Processing
---