### [How to Trigger an OptinMonster Campaign From a Form Submission](https://wpforms.com/developers/how-to-trigger-an-optinmonster-campaign-from-a-form-submission/)
**Published:** August 2, 2022
**Author:** Editorial Team
**Excerpt:** This tutorial will show you how you can trigger an OptinMonster campaign from a form submission and pre-populate any fields from the form over to the campaign using a little PHP and JavaScript.
**Content:**
## Introduction
Would you like to automatically trigger an [OptinMonster](https://optinmonster.com/ "Get started with OptinMonster today!") campaign from a form submission? You can easily create your form and have it not only trigger the campaign but also pre-fill in any fields such as name and email address from the form to the campaign to help save time. In this tutorial, we’ll show you how you can achieve this using a snippet.
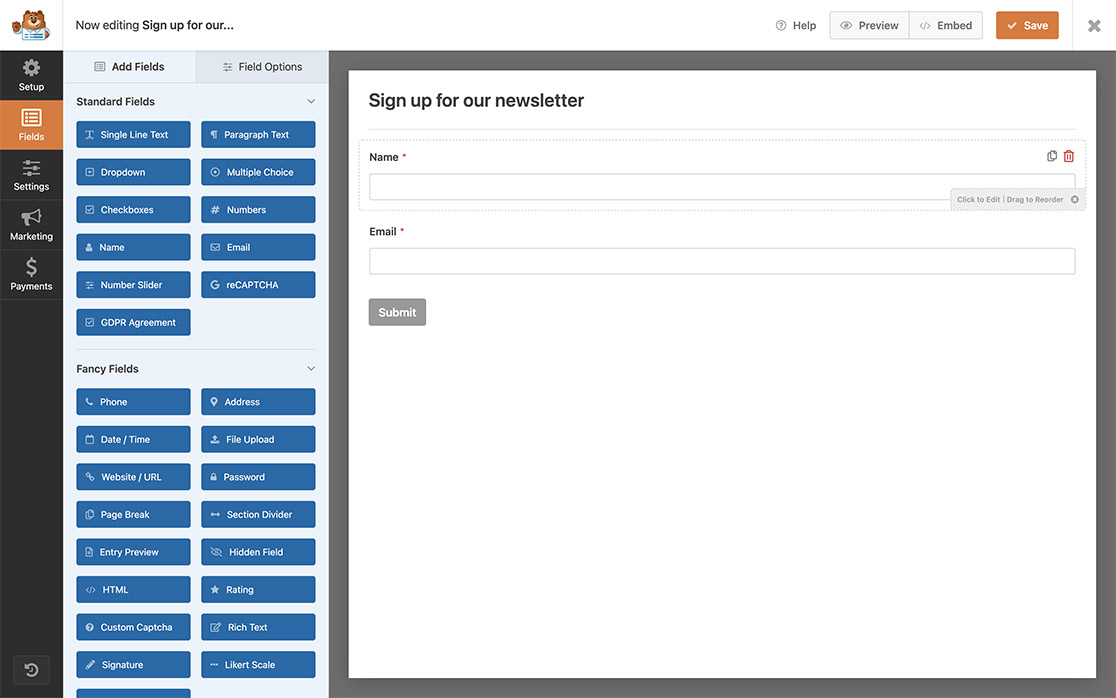
## Creating the form
To begin, we’ll create a new form and add our fields to it. For the purpose of this tutorial, our form will only contain the **Name** and **Email Address** fields.
If you need any assistance in creating your form, [please check out this documentation](https://wpforms.com/docs/creating-first-form/ "How to Create Your First Form").
## Setting up the OptinMonster campaign
Now it’s time to create an **OptinMonster** campaign. To create your campaign specifically for this tutorial, please follow these steps.
For this campaign, we’ll be using MonsterLinks. In order to use MonsterLinks, [a Pro subscription for OptinMonster is required](https://optinmonster.com/pricing/ "Pricing and license levels for OptinMonster").
#### 1) Creating the campaign
If this is your first time creating a campaign you can get started [following this guide](https://optinmonster.com/docs/creating-your-first-optin/ "Creating Your First Campaign").
#### 2) Adding the MonsterLink
Next, in the campaign builder add **MonsterLink** as a **Display Rule** to show the campaign only on click.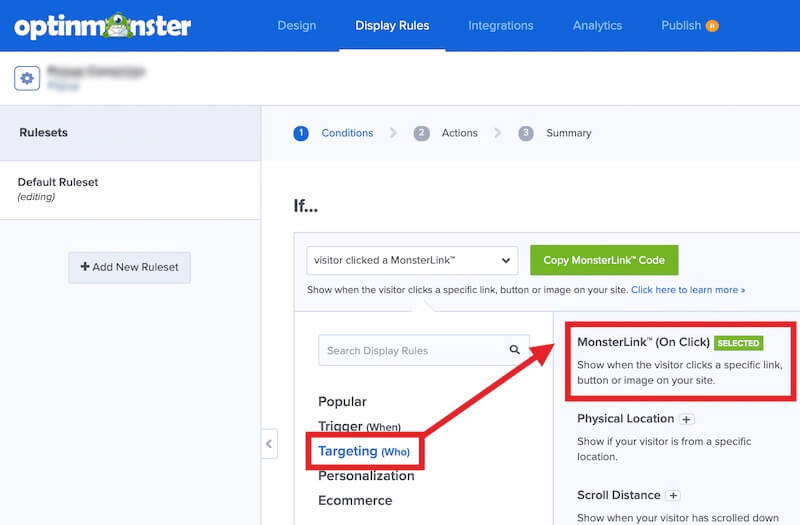
#### 3) Publishing the campaign
If you are using the **OptinMonster** WordPress plugin to manage your campaigns, be sure to **Publish** the campaign from the **WordPress admin » OptinMonster » Campaigns**. 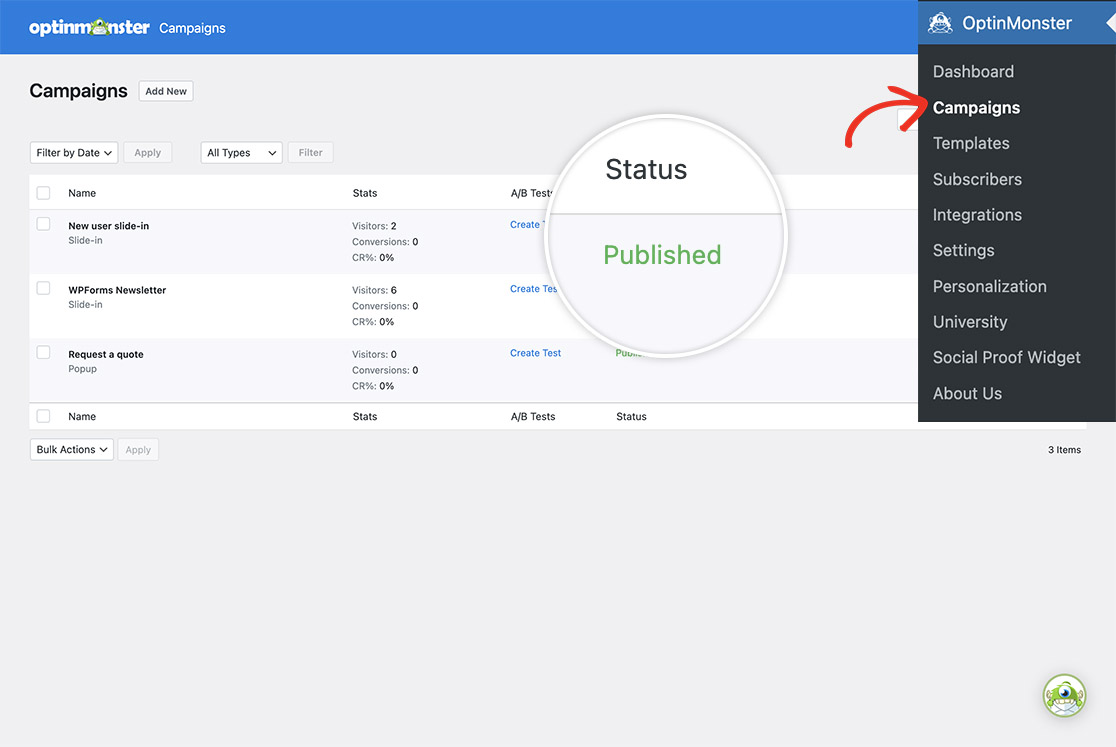
#### (Optional) Configuring the Output Settings
You can configure the **Output Settings** in the **OptinMonster** plugin to embed this campaign only on the page(s) where your WPForms form will appear.
Foor the purpose of this tutorial, we won’t be limiting any page for this to display. However, for further information on this topic, [please check out their documentation](https://optinmonster.com/docs/how-to-use-the-wordpress-output-settings-to-control-where-your-campaigns-appear/ "How to Use the WordPress Output Settings to Control Where Your Campaigns Appear").
## Adding the snippet
Now it’s time to add the snippet to your site. If you need any help in where and how to add snippets to your site,[ please review this tutorial](https://wpforms.com/developers/how-to-add-custom-php-or-javascript-for-wpforms/ "How to Add Custom PHP or JavaScript for WPForms").
```
/*
* Trigger Optinmonster campaign from a WPForms submission
*
* @link https://wpforms.com/developers/how-to-trigger-an-optinmonster-campaign-from-a-form-submission
*/
function trigger_om_campaign_from_wpf() {
// The WP Form ID.
// Find the form ID by following this tutorial: https://wpforms.com/developers/how-to-locate-form-id-and-field-id/
$form_id = 519;
// The OptinMonster campaign slug.
$campaign_slug = 'kofeog6veaiogw1gefbb';
// The field ID for the name field.
// Find the field ID by following this tutorial: https://wpforms.com/developers/how-to-locate-form-id-and-field-id/
$name_field = 0;
// The field ID for the email field.
// Find the field ID by following this tutorial: https://wpforms.com/developers/how-to-locate-form-id-and-field-id/
$email_field = 1;
if ( empty( $_POST[ 'wpforms' ][ 'complete' ] ) ) {
// Bail if a WP Form was not submitted.
return;
}
if ( $form_id !== (int) $_POST[ 'wpforms' ][ 'id' ] ) {
// Bail if not correct WP Form.
return;
}
$entry = $_POST[ 'wpforms' ][ 'complete' ];
$email = '';
$name = '';
// WPF name field submitted value.
if ( ! empty( $entry[ $name_field ][ 'value' ] ) ) {
$name = sanitize_text_field( wp_unslash( trim( $entry[ $name_field ][ 'value' ] ) ) );
}
// WPF email field submitted value.
if ( ! empty( $entry[ $email_field ][ 'value' ] ) ) {
$email = sanitize_text_field( wp_unslash( trim( $entry[ $email_field ][ 'value' ] ) ) );
}
?>
**Categories:** Tutorials
**Tags:** Javascript, JS, OptinMonster, PHP
---