### [How to Add Falling Snow Animation to Your Confirmation Message](https://wpforms.com/developers/how-to-add-falling-snow-animation-to-your-confirmation-message/)
**Published:** November 5, 2021
**Author:** Editorial Team
**Excerpt:** This tutorial will show you how to use JavaScript and PHP to create a snow falling effect on your confirmation message.
**Content:**
## Introduction
Would you like to add a falling snow animation to your confirmation message? You can easily add some animation to the confirmation message that would have more of an interactive effect using PHP and JavaScript. In this tutorial, we’ll break down each step on how to achieve this.
## Creating your form
First, you’ll need to create your form. For the purpose of this tutorial, we’ve created an order form. Once the order is complete, a confirmation message will be displayed that our falling snow animation will appear on.
If you need any help in creating your form, please [visit this documentation](https://wpforms.com/docs/creating-first-form/ "Creating Your First Form").
Once you’ve added your fields, click on the **Settings** tab and then click **Confirmations**. Inside the **Confirmation Message** window, we’re going to add an HTML canvas element that has an ID of **canvas** so that we can target exactly where the confetti will fall.
Once inside the **Confirmations** tab, remember to click the **Text** tab on the message box. You’ll need to do this in order to add pure HTML into this message area.
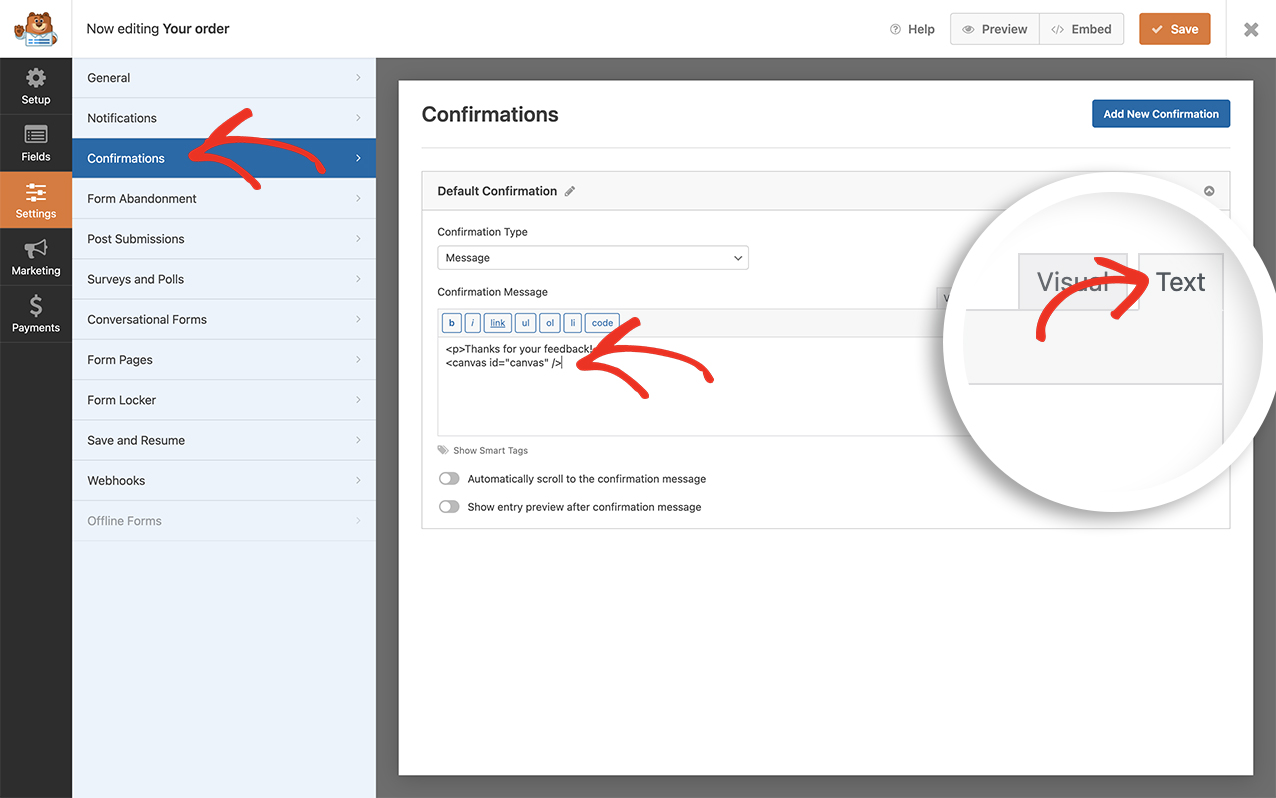
Simply add ``
Adding this canvas element and ID means that we can control where this snow will appear. We only want it to show in the confirmation message so we’re adding an element that we can specifically target in our code snippet.
This snippet only runs on non-AJAX forms. You’d need to turn off your AJAX settings inside the form builder. To disable this setting go to the **Settings** tab inside the form builder and under the **Advanced** setting, **disable** the **Enable AJAX form submission** setting.

## Adding the CSS for the canvas wrapper
We need to also add some custom CSS for the `` wrapper. If you need any help in how and where to add custom CSS, [please check out this tutorial](https://wpforms.com/developers/how-to-add-custom-css-styles-for-wpforms/ "How to Add Custom CSS Styles for WPForms"). Simply copy and paste this CSS to your site.
```
canvas#canvas {
position: absolute;
top: 0;
left: 0;
}
```
## Adding the code snippet to create the snow
Now it’s time to add the code snippet that will make the magic happen. For any assistance in adding a snippet to your site, [please see this tutorial](https://wpforms.com/developers/how-to-add-custom-php-or-javascript-for-wpforms/ "How to Add Custom PHP or JavaScript for WPForms").
```
/**
* Add falling snow to the canvas element on the confirmation message
*
* @link https://wpforms.com/developers/how-to-add-falling-snow-animation-to-your-confirmation-message/
*/
function wpf_dev_winter_scene_animation() {
?>
**Categories:** Tutorials
**Tags:** Javascript, JS, PHP
---