### [Adding a Stripe Buy Button After Confirmation](https://wpforms.com/developers/how-to-add-a-stripe-buy-button-after-confirmation/)
**Published:** June 8, 2023
**Author:** David Ozokoye
**Excerpt:** This tutorial will walk you through how to display a Stripe buy button on your confirmations page after the form submits.
**Content:**
Would you like to display a Stripe buy button after the confirmation message? WPForms lets you create payment forms in WordPress. However, the form you create will use the default WPForms submit button. With a custom PHP snippet, you can customize your form to show the buy button you’ve created on your Stripe account.
In this tutorial, we’ll show you how to add the Stripe Buy button in WPForms.
## Creating the Form
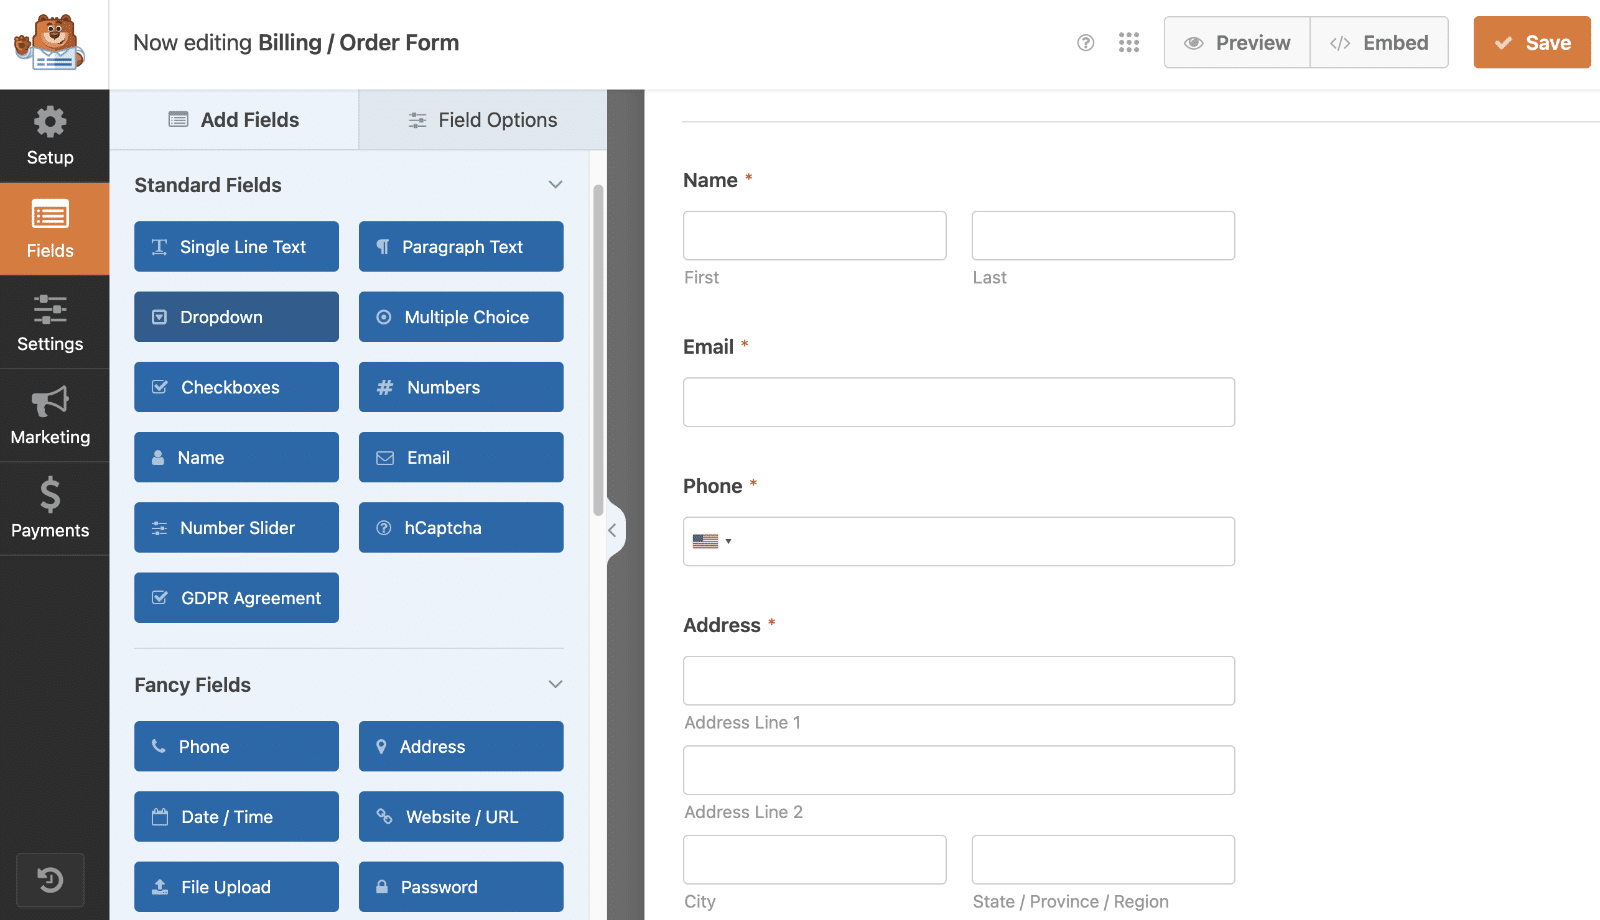
To begin, [create a new form](https://wpforms.com/docs/creating-first-form/) or edit an existing one to access the form builder. In the form builder, go ahead and add your fields to the form. For our example, we’ll create a volunteer sign-up form to gather information on users who wish to volunteer.
## Disabling AJAX for the Form
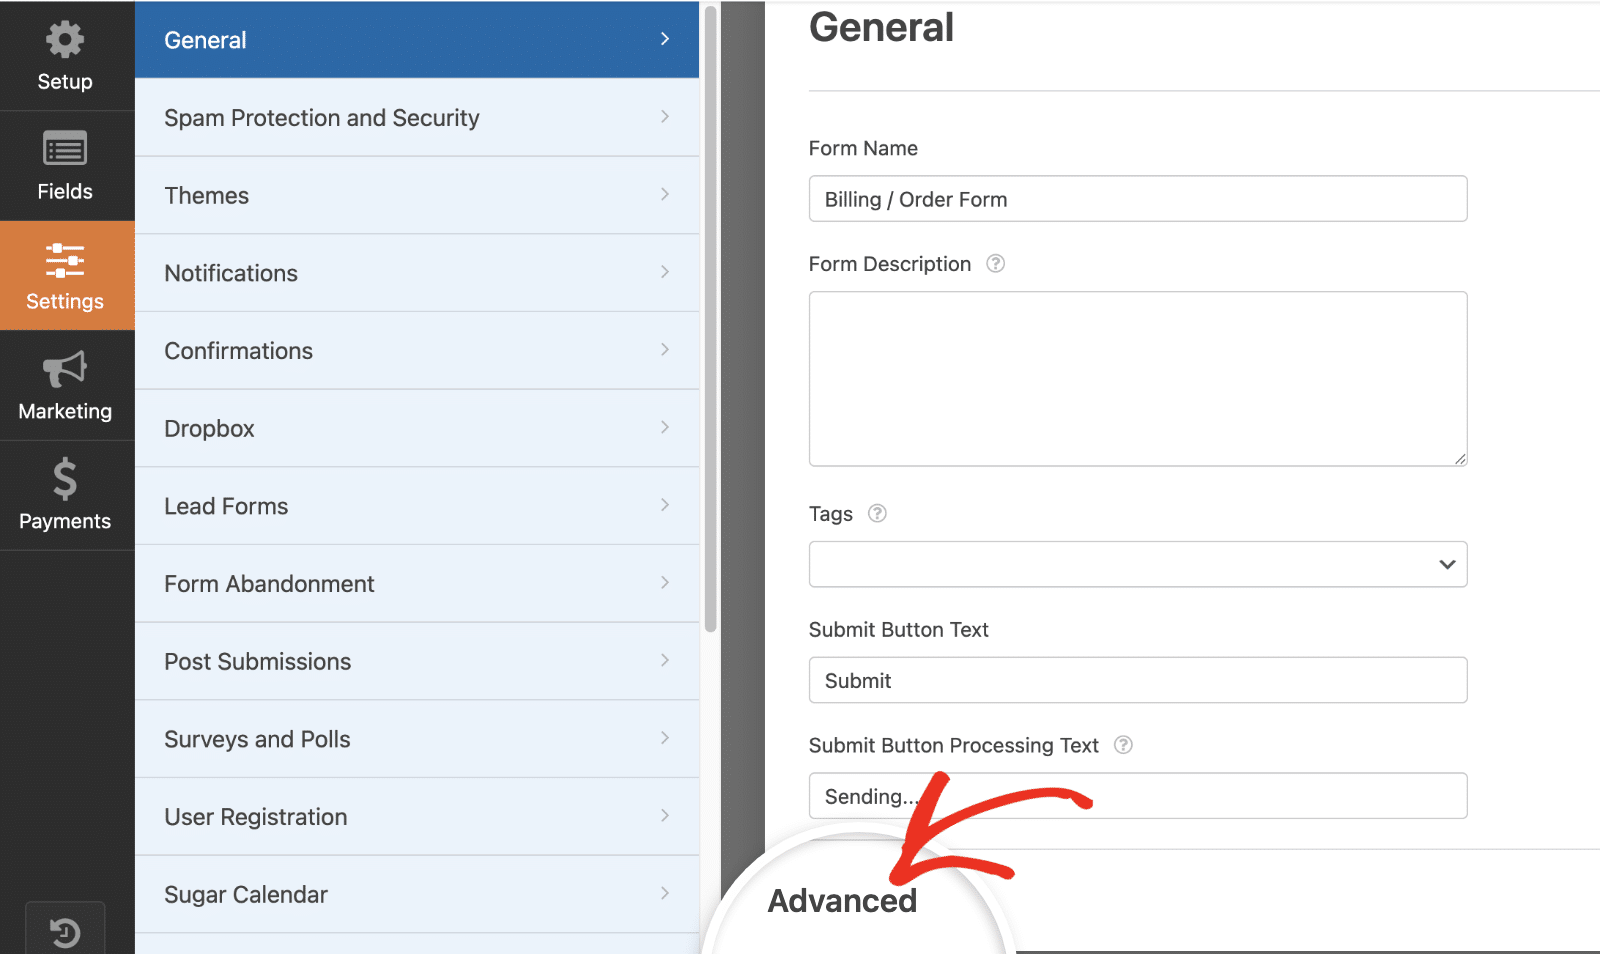
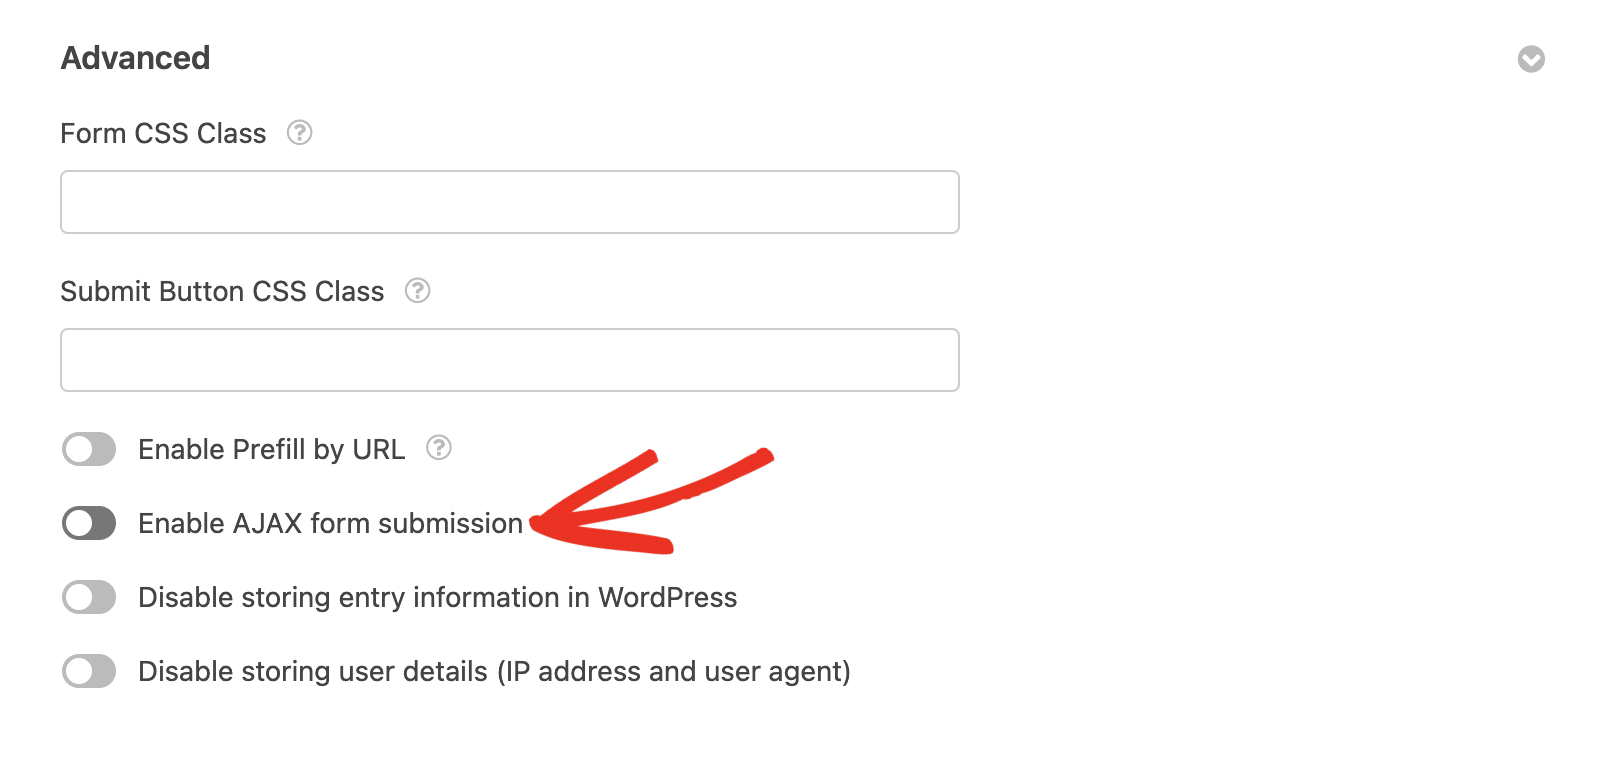
The next step is top disable AJAX form submission. To do so, go to **Settings » General** and click **Advanced** to open advanced settings.
Once here, toggle off the **Enable AJAX form submission** option. This step is crucial because, when enabled, it prevents the page from detecting the action. As a result, your button will not be displayed.
## Enabling Entry Preview (optional)
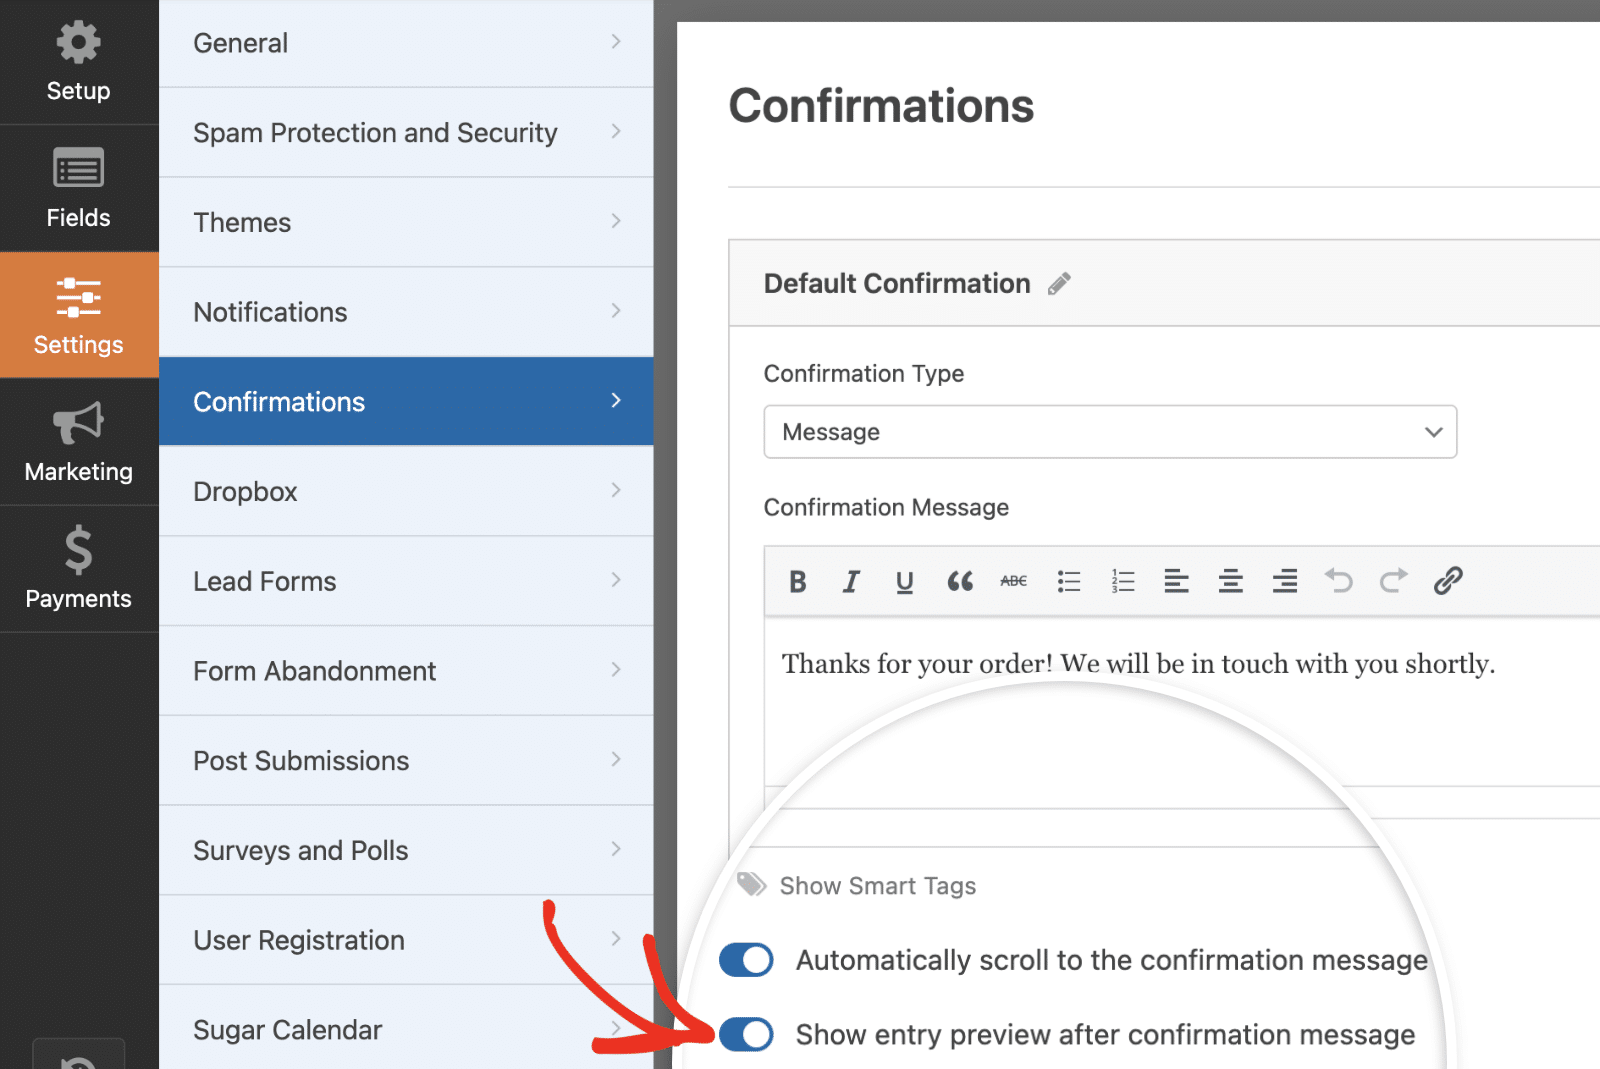
For this tutorial, we want to show the entry preview after submitting the form. To complete this step (which is completely optional), navigate to **Settings » Confirmations**. Here, toggle the **Show entry preview after the confirmation message** option to the on position.
Be sure to save your changes after updating your form.
## Adding the Snippet
Now it’s time to add the snippet that will add this button after the form is submitted. If you need help with how and where to add snippets to your site, [please check out this tutorial](https://wpforms.com/developers/how-to-add-custom-php-or-javascript-for-wpforms/ "How to Add Custom PHP or JavaScript for WPForms").
```
/*
* Add Stripe buy button embed code after form is submitted
*
* @link https://wpforms.com/developers/how-to-add-a-stripe-buy-button-after-confirmation/
*/
function wpf_dev_add_stripe_embed_button( $form_data, $fields, $entry_id ) {
// Below, we restrict output to 3116
// This ID will need to be updated
if ( absint( $form_data[ 'id' ] ) !== 3116 ) {
return;
}
// Below starts the JavaScript needed to create your button
// Remember to replace the button ID and publishable key to match your own Stripe account
// https://stripe.com/docs/payment-links/buy-button
?>
**Categories:** Tutorials
**Tags:** PHP, Stripe
---