Would you like to use Google’s reCAPTCHA to help prevent spam in your WordPress forms? Adding reCAPTCHA allows you to use human verification technology in your forms, which can decrease the number of spam submissions you receive.
This tutorial will walk you through how to set up and use the reCAPTCHA option in WPForms.
In This Article
Note: If you’d like to explore additional spam prevention methods beyond Google reCAPTCHA, be sure to check out our complete guide to preventing spam in WPForms.
Accessing WPForms CAPTCHA Settings
To get started, you’ll need to log in to your WordPress site and go to WPForms » Settings. Then, click on the CAPTCHA tab.

To configure Google reCAPTCHA, select the reCAPTCHA option.

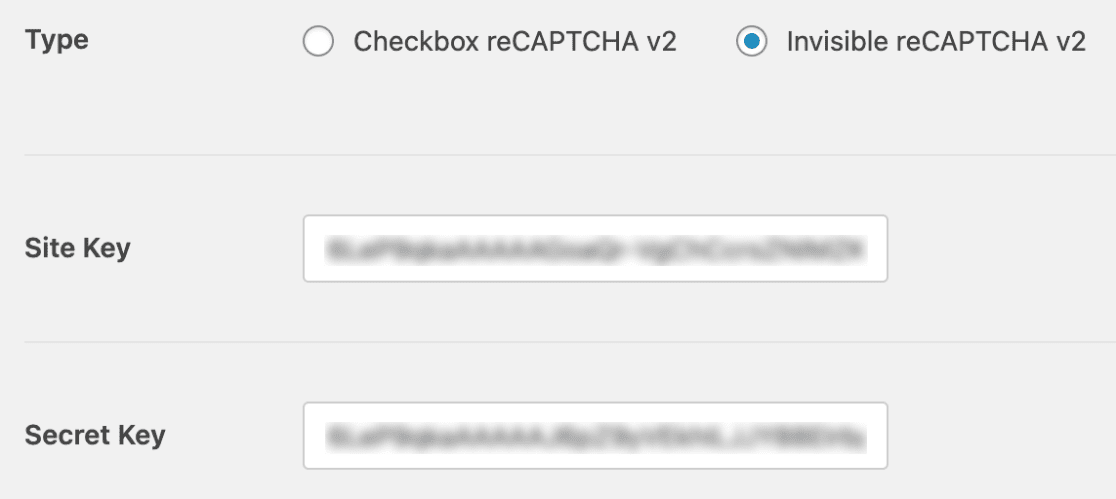
Then, in the settings that appear, go ahead and select the reCAPTCHA Type you’d like to use.

Note: For an overview of each reCAPTCHA type, be sure to check out our tutorial on choosing a CAPTCHA for your forms. Each reCAPTCHA type requires a different set of keys, so if you later decide to switch types you will need to generate a new set of keys.
Generating reCAPTCHA Keys in Google
Next, you’ll need to set up reCAPTCHA in your Google account to generate the required keys. To start this setup process, you’ll need to open Google’s reCAPTCHA admin console.
Here you’ll be asked to sign in to your Google account. What you see on login will depend on whether you’ve set up reCAPTCHA with this account before.
If you have set up a reCAPTCHA with this account in the past, you’ll need to click the + (plus) icon to add a new site.
![]()
If you’ve never set up reCAPTCHA before, you’ll be directed straight to the reCAPTCHA setup form.

Below, you’ll find more details on how to fill out each field in this form.
- Label: This is only visible to you, so enter any name that makes logical sense (most commonly the website name).
- reCAPTCHA type: Select the version of reCAPTCHA that you’d like to use.
Note: If you choose to enable the v3 reCAPTCHA, no reCAPTCHA badge will be shown on the frontend of your site when used with a Conversational Form.
- Domains: Enter the URL where you’ll be using reCAPTCHA. Do not include “http://www” at the start (for example, wpforms.com would be accepted, but https://wpforms.com or www.wpforms.com would not).
Once the form is complete, go ahead and click the Submit button.

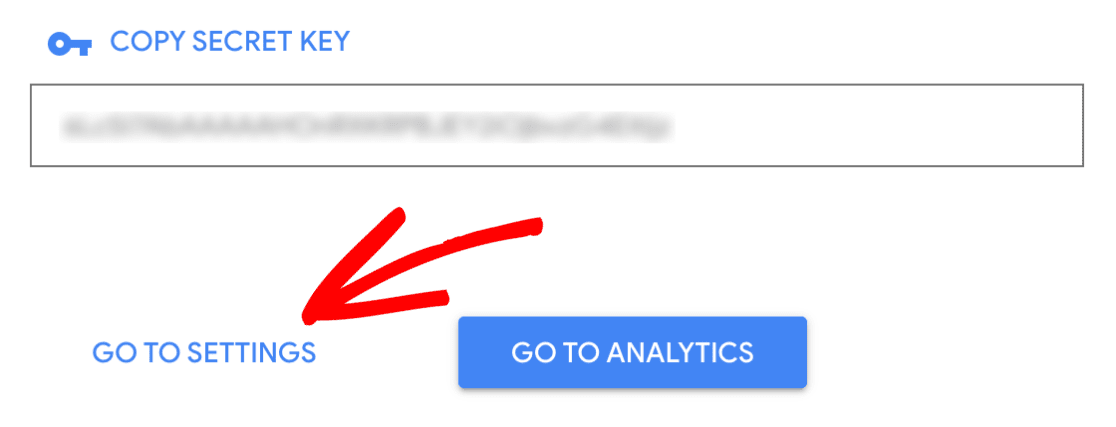
After registering, you should see a page with the keys for your website.
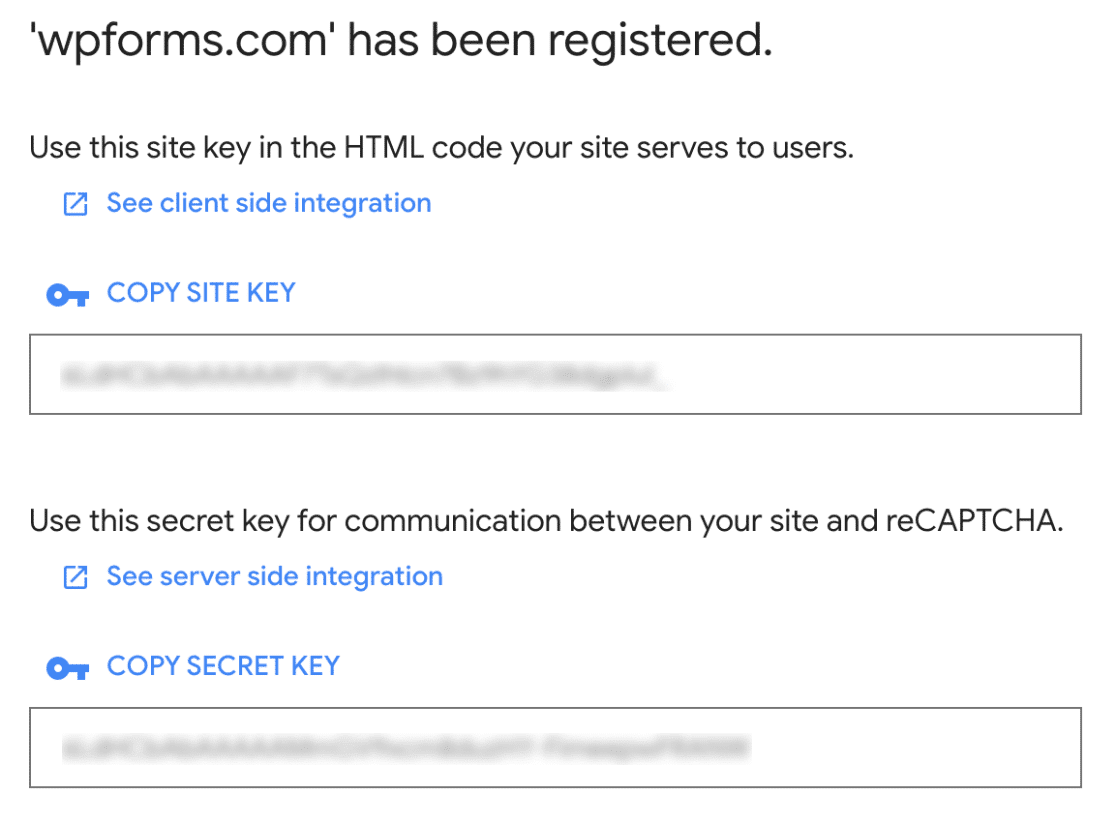
You’ll need to copy the Site Key and Secret Key. Then, switch back to your WordPress dashboard and go to WPForms » Settings. Then, click on the CAPTCHA tab. From here, scroll down and paste these keys into the corresponding Site Key and Secret Key fields.
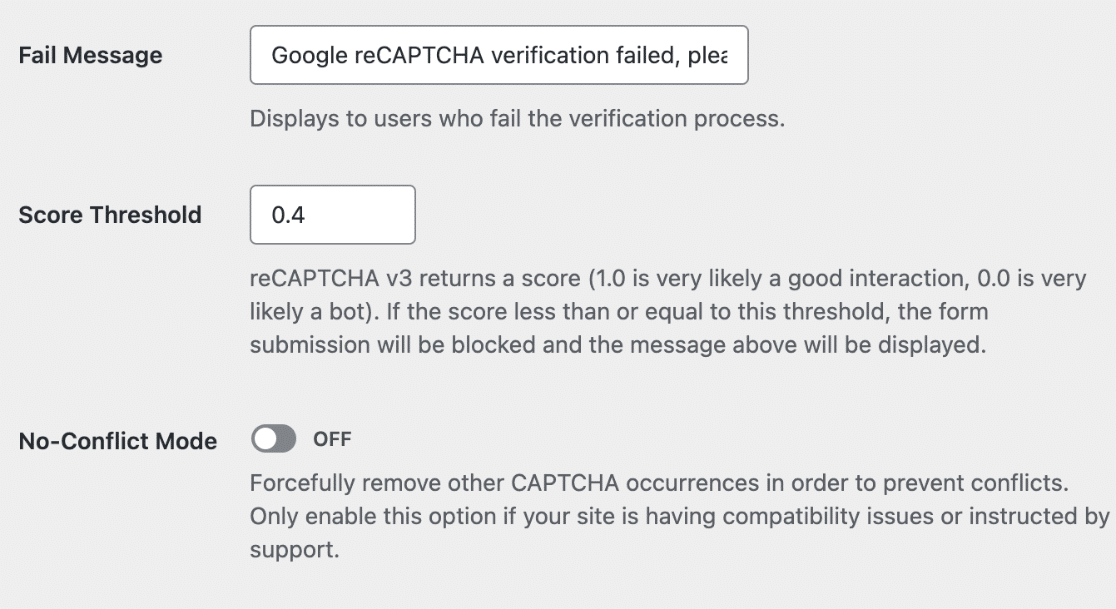
Now that you’ve added your reCAPTCHA keys, you can also optionally adjust other reCAPTCHA settings.
- Fail Message: This error will display to any user who does not pass reCAPTCHA’s verification test.
- Score Threshold (for reCAPTCHA v3 only): This is the score at which you want users to fail reCAPTCHA v3’s verification. Scores can range from 0.0 (very likely a bot) to 1.0 (very likely a good interaction).
- No-Conflict Mode: If reCAPTCHA is being loaded more than once on your site (for example, by both WPForms and your WordPress theme), it can prevent reCAPTCHA from working properly. No-Conflict Mode will remove any reCAPTCHA code that’s not loaded by WPForms. We highly recommend getting in touch with our support team if you’re at all unsure whether to use this option.
- Preview (for Checkbox reCAPTCHA v2 only): If reCAPTCHA is configured correctly, you’ll see a preview of what it will look like on your site.
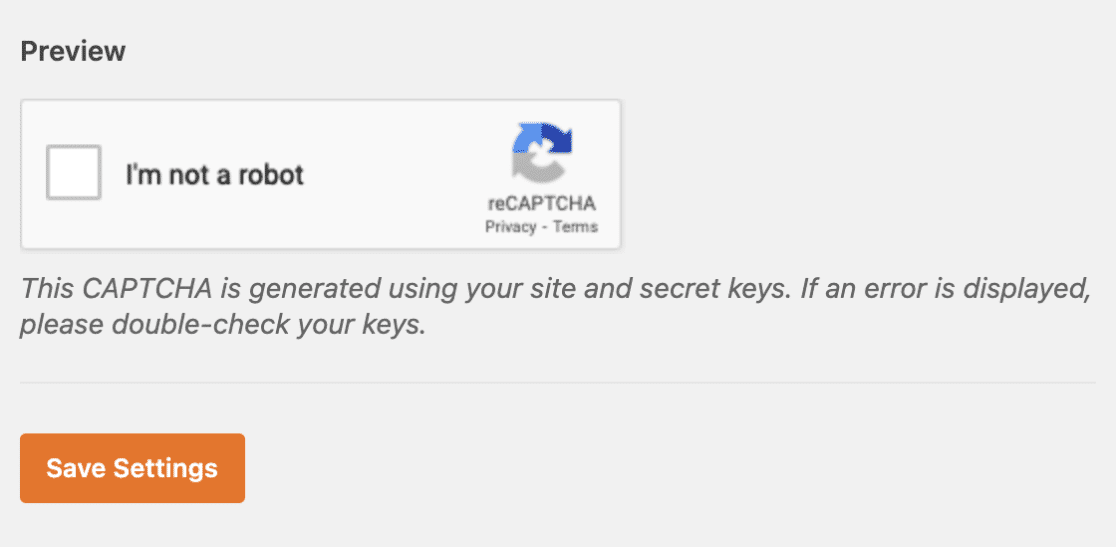
Be sure to click on the Save Settings button at the bottom of this page to store your setting changes.
Additional Steps for AMP Users (reCAPTCHA v3 Only)
If you’re running Google AMP on your WordPress site, then you’ll need to make an extra adjustment in your reCAPTCHA setup to ensure compatibility with AMP.
Note: When running Google AMP along with reCAPTCHA, a reCAPTCHA badge will not display on the frontend of your site.
Underneath the reCAPTCHA keys, click Go To Settings.
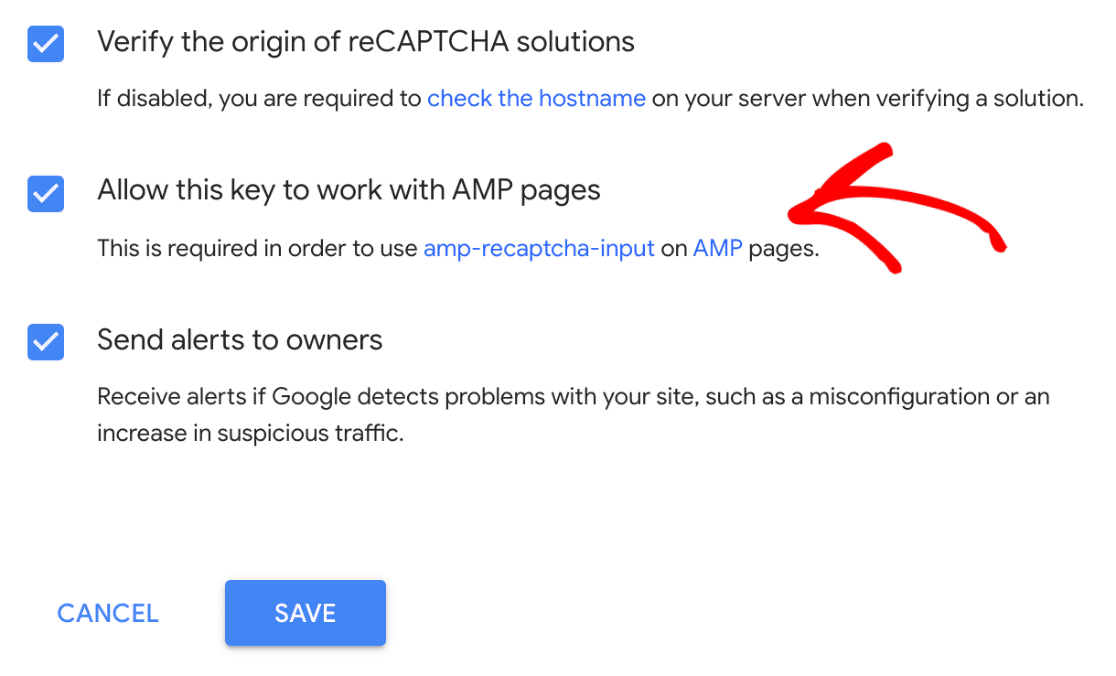
This will open up your reCAPTCHA settings again. However, now you’ll be shown an extra setting that was hidden earlier.
Towards the bottom of this page, check the new box labeled Allow this key to work with AMP pages. Then, click Save once more.
Adding reCAPTCHA to a Form
Now that you’ve set up your reCAPTCHA keys, you’ll be able to add reCAPTCHA to any of your WPForms.
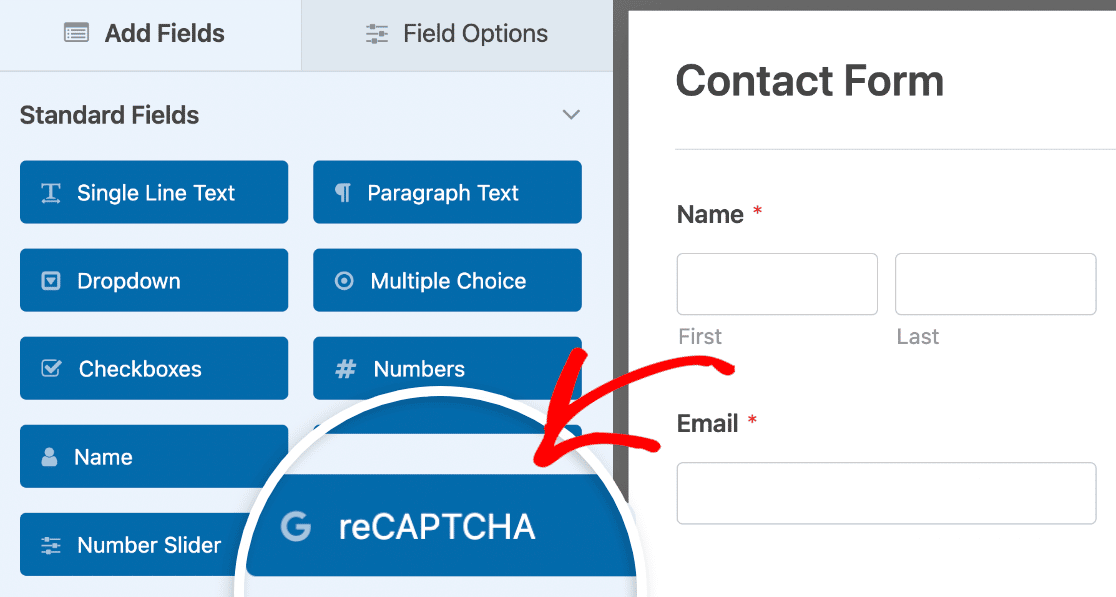
To do this, go ahead and create a new form or edit an existing one.
After you’ve opened the form builder, look under the Standard Fields section and click on the reCAPTCHA field.
Alternatively, you can always enable reCAPTCHA by going to Settings » Spam Protection and Security in the form builder.

Under the Protection section, you can enable the Store spam entries in the database option if you’d like to review spam entries before deleting them from the entries page.

Enabling this option stores all submissions, including those flagged as spam by Google reCAPTCHA.
Note: The Enable minimum time to submit option helps prevent bot submissions by setting a minimum time before submissions are allowed on the form. See our spam prevention guide for more details.
Next, scroll down to the section labeled CAPTCHA. You’ll need to toggle the switch to the “on” position.

Note: The label on the CAPTCHA switch depends on the version of reCAPTCHA you configured. For example, if you set up reCAPTCHA v3, the label will read “Enable Google v3 reCAPTCHA.”
To confirm that your reCAPTCHA is enabled, look for the badge in the upper right corner of the form builder.
![]()
Note: If no badge appears in your form builder, make sure you’ve correctly set up your reCAPTCHA keys.
Testing reCAPTCHA
The last step is to run a quick test to ensure that reCAPTCHA looks and works as you expect. To test this out, you’ll simply need to submit the form to initiate the reCAPTCHA verification process.
If you’ve set up Checkbox reCAPTCHA v2, when filling out your form, you’ll be asked to verify that you’re human. This often involves clicking on a checkbox or identifying specific images in a set. If you see this, then reCAPTCHA is working correctly.

If you’ve configured Invisible reCAPTCHA v2 or reCAPTCHA v3, you won’t see this interactive step. However, look for a reCAPTCHA badge (usually in the lower right corner of your screen), signifying the presence and operation of reCAPTCHA v3.

For more details on how to test out your forms, please take a look at our full testing checklist.
Viewing Spam Entries
If you enabled the spam entry storage option, you’ll be able to view entries identified as spam from the Entries page.
There is also an option to recover entries that may have been mistakenly flagged as spam by Google reCAPTCHA.

For a detailed guide, please see our tutorial on viewing and managing spam entries.
Frequently Asked Questions
These are answers to some top questions about setting up Google reCAPTCHA with WPForms.
Can I use reCAPTCHA if my site uses a subdomain?
Google reCAPTCHA does work with subdomains. However, reCAPTCHA won’t accept subdomain sites with the path format (e.g., https://domain.com/subdomain). If you’re using a subdomain for your site, be sure to format your site URL as subdomain.domain.com when setting up your reCAPTCHA keys.
I’m still getting spam with reCAPTCHA enabled. What can I do to stop this?
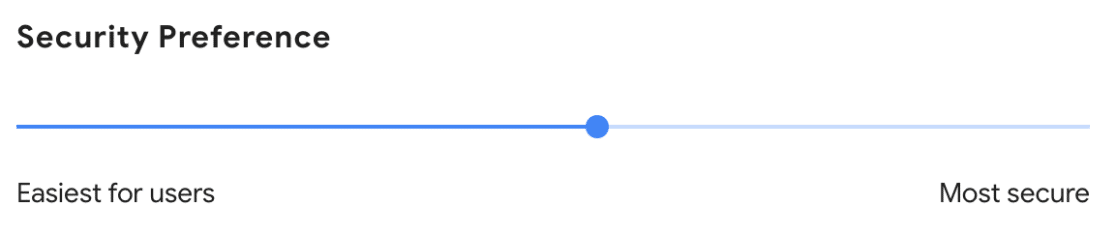
If you’re using the v2 reCAPTCHA, you can adjust the difficulty settings for your reCAPTCHA from your Google reCAPTCHA account.
To increase the difficulty of your reCAPTCHA, navigate to the Security Preference section of your reCAPTCHA settings. From here, you can adjust the slider to be more secure.
What should I do if I get a “Google reCAPTCHA verification failed, please try again later” error?
If you see this error after trying to submit a form, there are a few potential causes to consider:
- Incorrect reCAPTCHA keys: One of the most common reasons for this error is having incorrect reCAPTCHA keys. Double-check the keys in your WPForms settings and ensure they match with what’s in your Google reCAPTCHA account. If you’re unsure, you can generate a new set of reCAPTCHA keys.
- Optimization plugins interference: Some optimization plugins, like WP Rocket or Autoptimize, might interfere with the functionality of reCAPTCHA. If you suspect this is the case, try temporarily disabling the JavaScript optimization settings in your optimization plugin. Remember to save these changes and clear your site’s cache afterward. This can help determine if the plugin is causing the reCAPTCHA verification to fail.
How can I change the position of the v2 Invisible reCAPTCHA badge?
To adjust the position of the v2 Invisible reCAPTCHA badge on your forms, you can use a specific code snippet from the WPForms code snippets library. This customization allows you to move the badge to a different location on your form, enhancing the form’s appearance and user experience.
For detailed instructions, visit our developer documentation on changing the position of the v2 Invisible reCAPTCHA badge.
That’s it! We just showed you how to add Google’s reCAPTCHA to your WPForms.
Next, would you like to keep a record of events that occur within your WordPress forms? Be sure to check out our guide on how to enable activity logging for more details.